Print product development at bigDAWGS

Task

Print products I took from brief to production at bigDAWGS, 2022 to 2024: a video card whose printed cover wraps the whole screen module, sold by bigDAWGS today; our own smart socket box, sold on Amazon; a box line for a client, still in production; and the foil tests behind them. I designed the structures and made the dielines and production files.

  • Strategy

    Structure, material testing, file standards

  • Design

    Dielines, packaging, raised foil and varnish

  • Role

    Design Lead, then Head of Design, bigDAWGS

PRINT PRODUCT DEVELOPMENT · BIGDAWGS

Print that works as a product

At bigDAWGS I took print products from a brief to a finished piece: the structure, the dieline, the test cuts and the press files. The work here runs from a video card whose printed cover wraps the whole screen module, to our own smart socket box, sold on Amazon, and a client’s crystal and candle line, still in production in boxes I designed. Foil tests behind them showed what our presses could do.

How I take a print product from brief to production
  1. 01Brief and product size
  2. 02Structure and dieline
  3. 03White board test cuts
  4. 04Press files, one plate per finish
  5. 05Print, finish and die cut
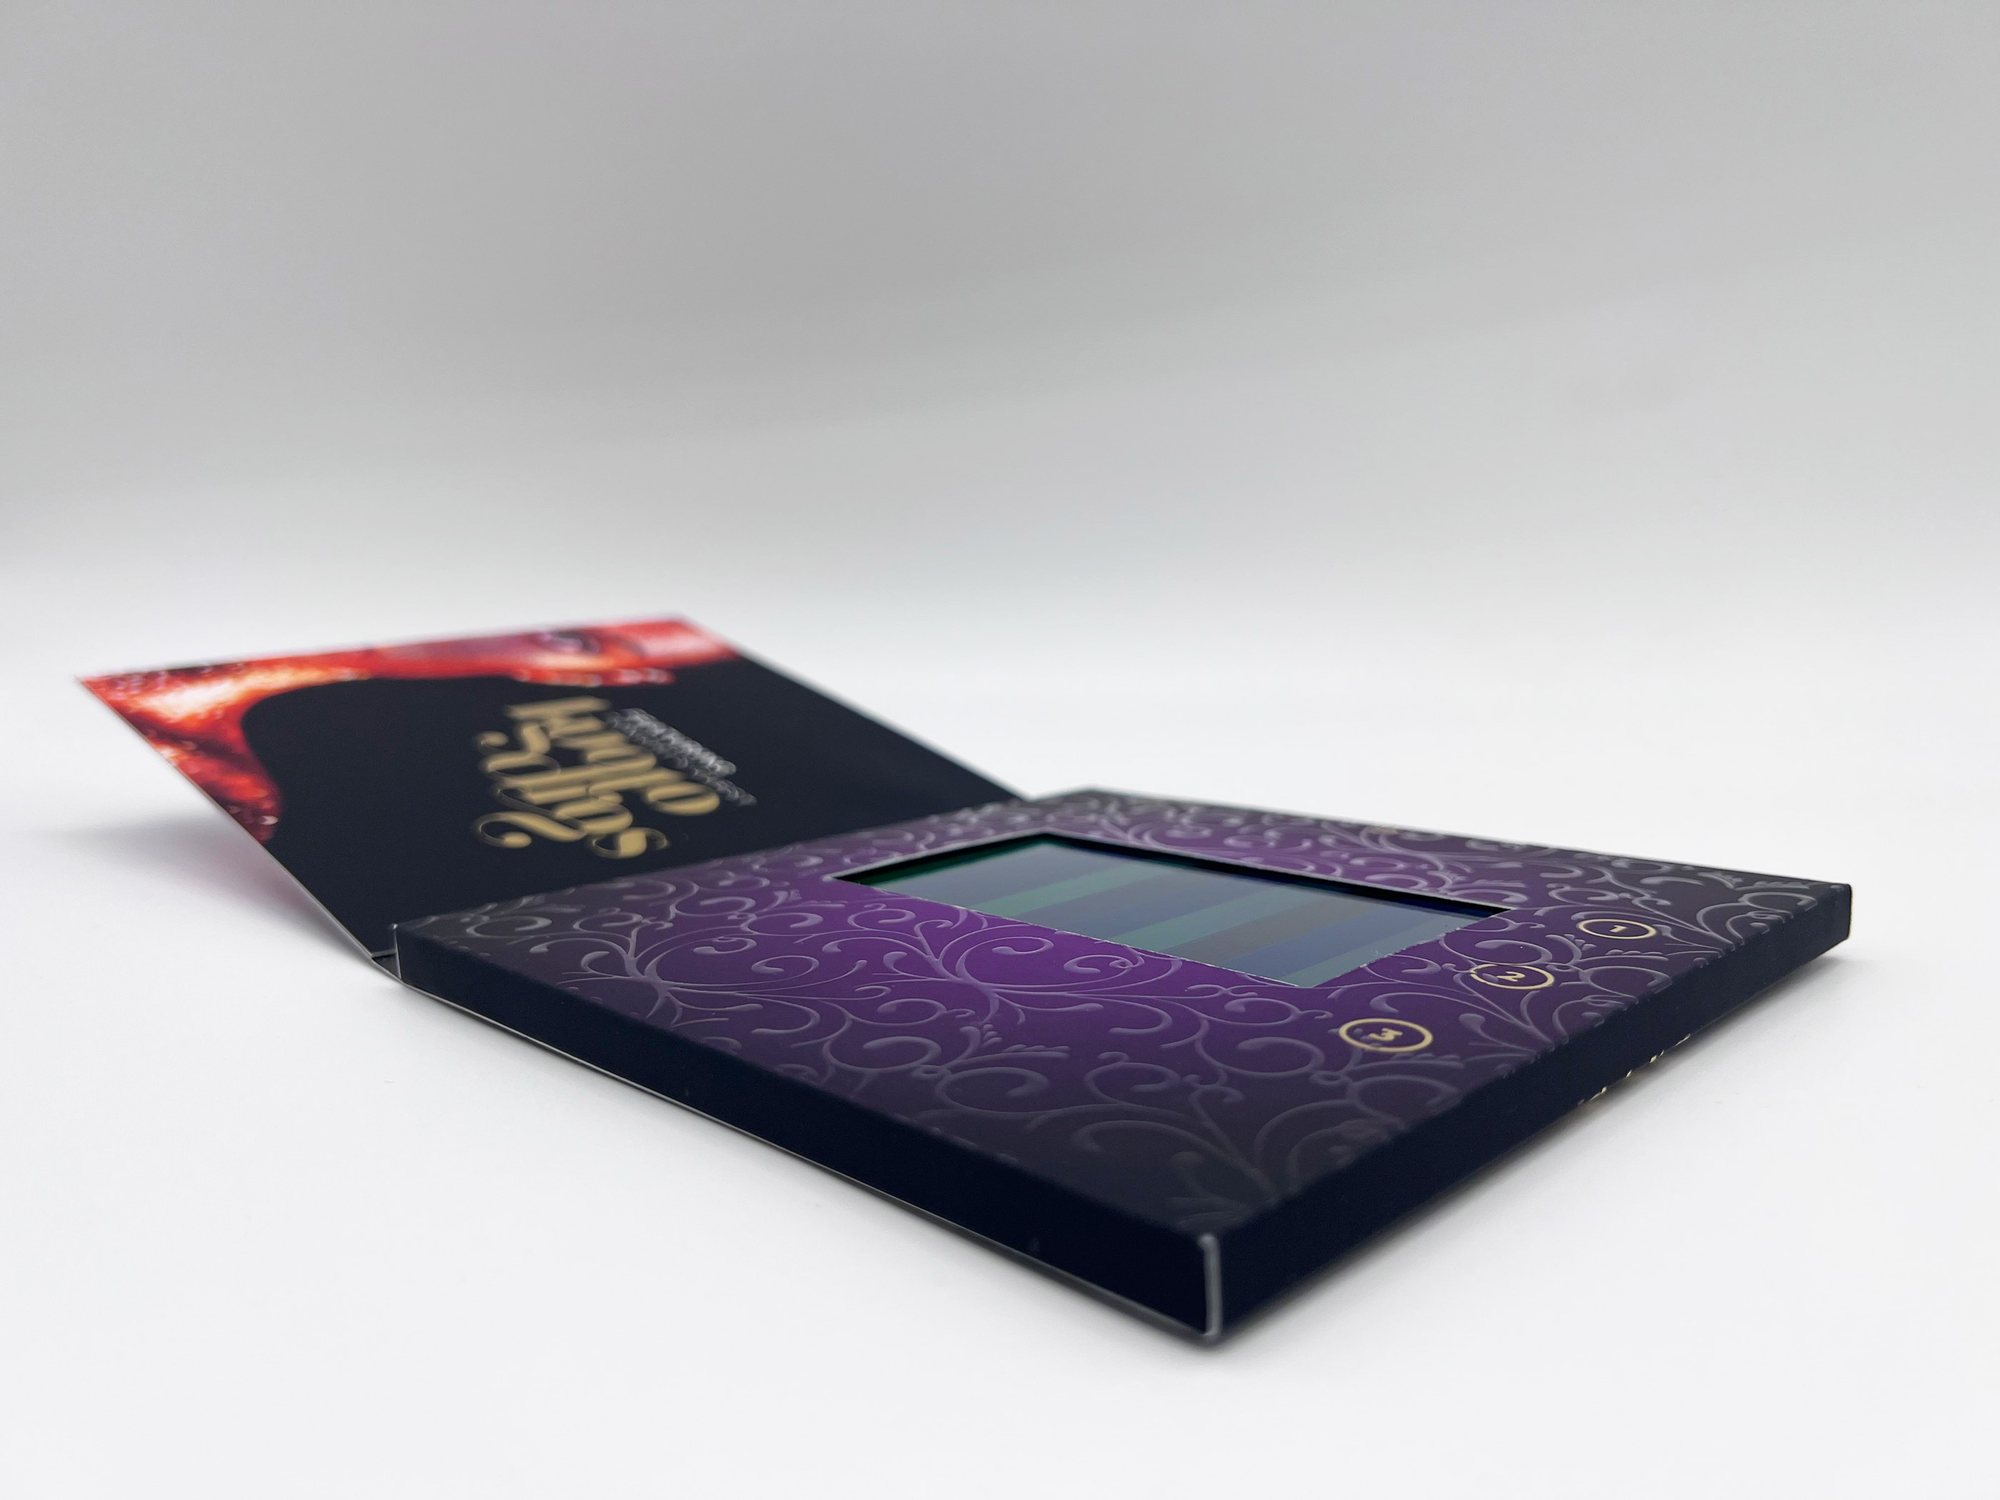
Printed video card lying open, its screen set into a printed cover that wraps the whole module
01. The full wrap video card

A cover for the part you can’t print on

A video card is a folding card with a screen, buttons and a speaker built in. I redesigned its cover so the print wraps the whole screen module, and the card can be any colour, white included.

The problem

A video card’s screen module is black, and on a standard card it shows along every edge and around the switch and ports. It can’t be printed on, so every card carries black, whatever the brand’s colours.

What I designed

One flat sheet, die cut with a screen window and openings for the switch and USB ports, creased and folded around the module, so the print covers the front, the back and every edge.

How I tested it

Plain white builds first, to get the folds and openings right, then printed samples with foil and raised varnish.

Result

A product bigDAWGS sells today, in clean white or printed edge to edge in the client’s own colours.

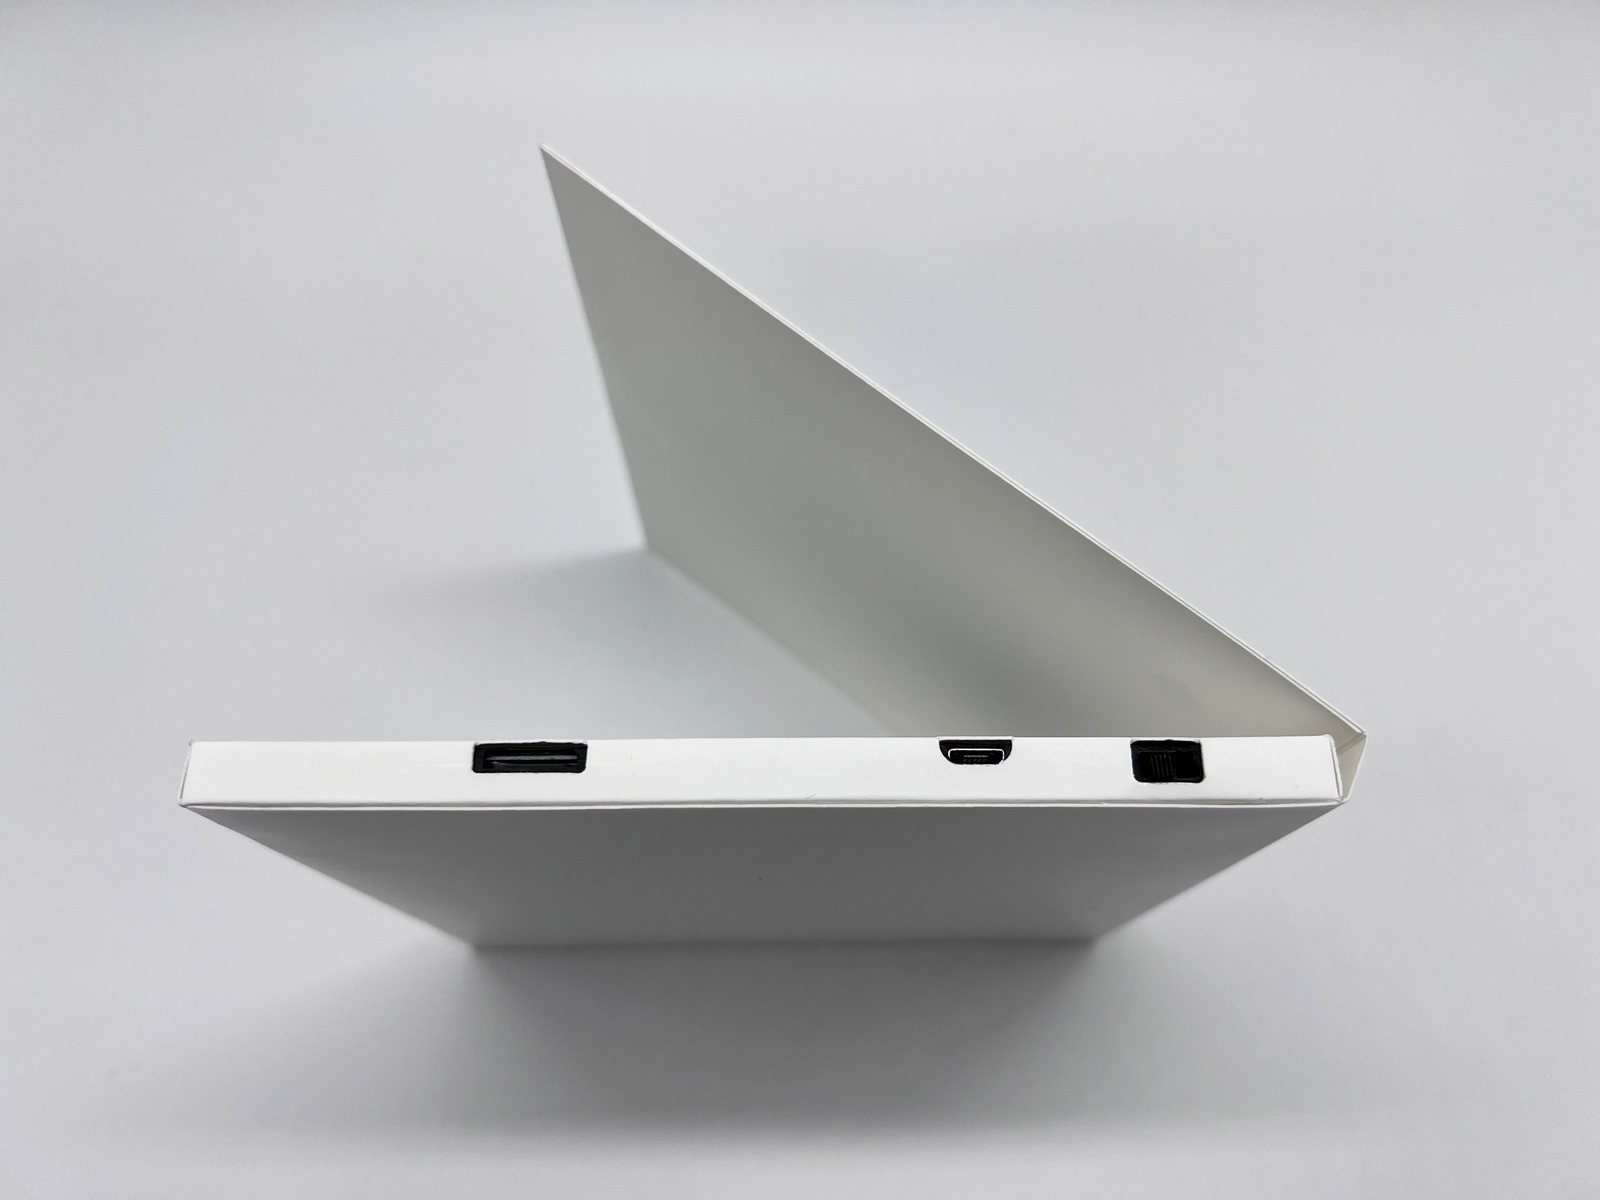
White full wrap video card from the side, with the port openings cut into the wrap
White card, no black at the edges or around the ports
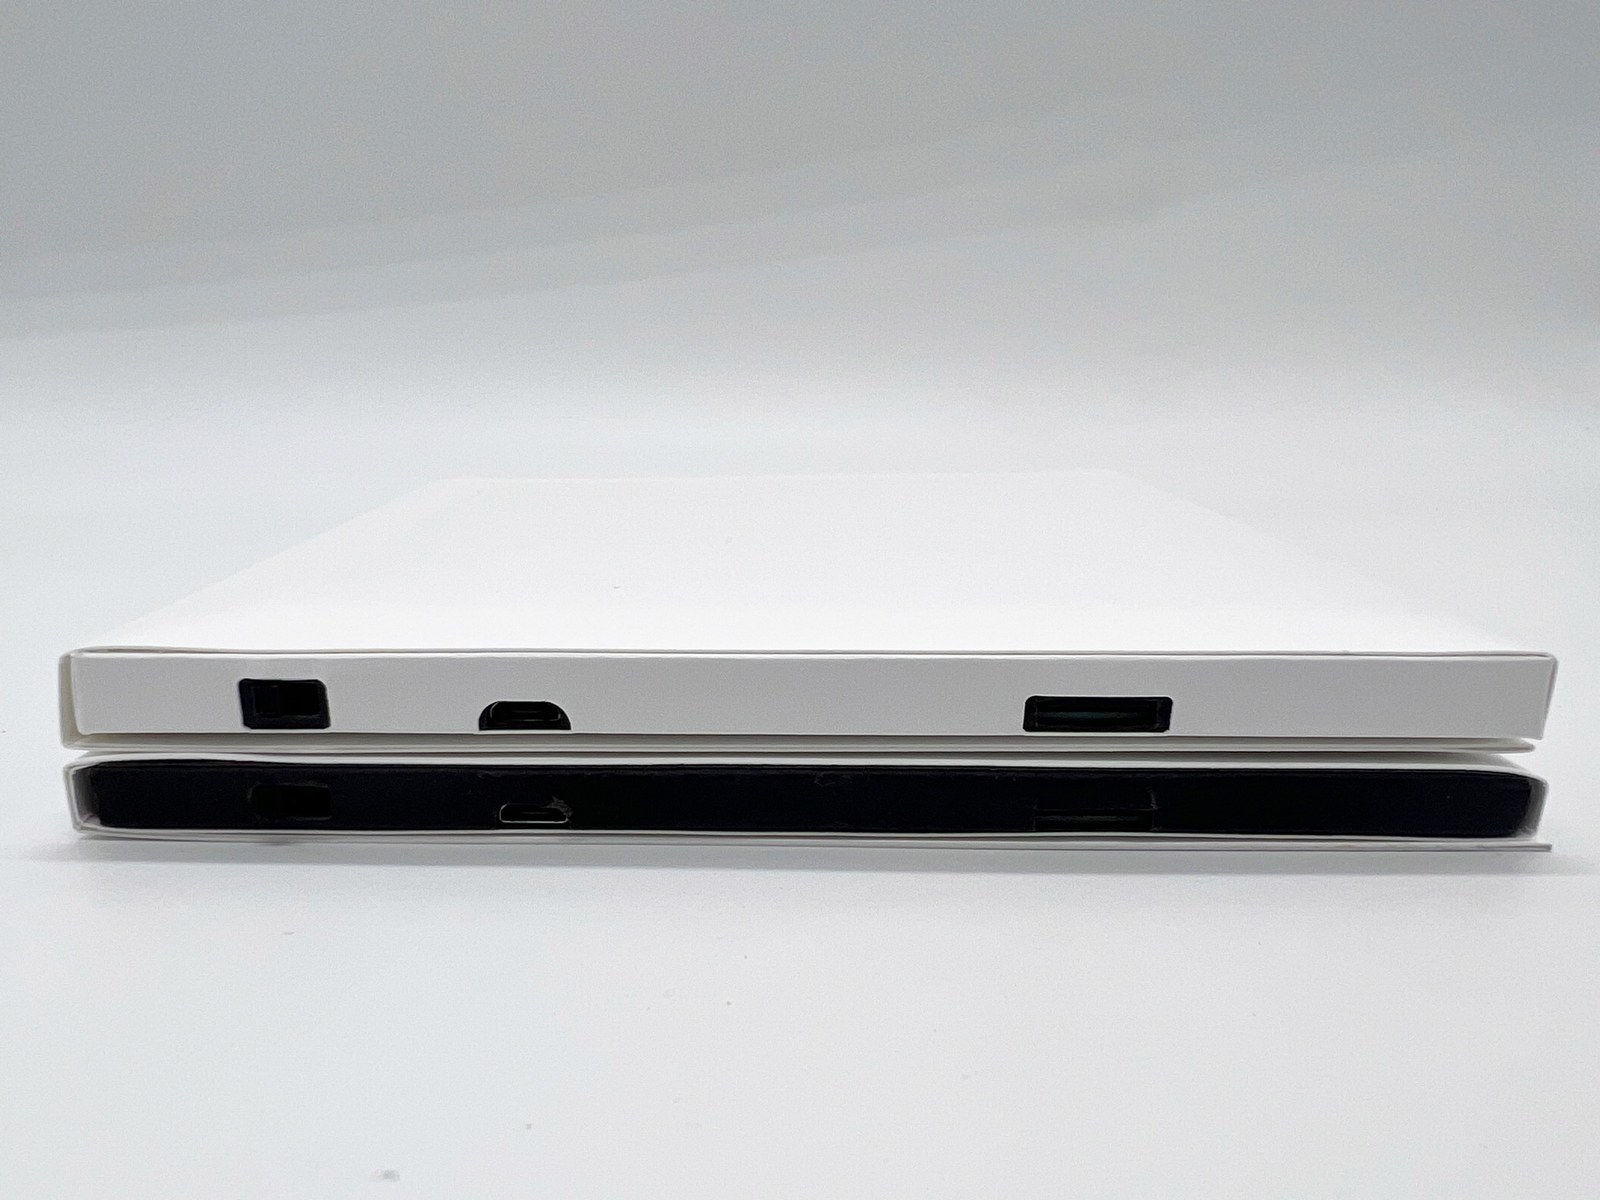
A white full wrap video card stacked on a standard video card: the full wrap is white along its edge and ports, the standard card shows a black band
Full wrap on top, standard card with black below
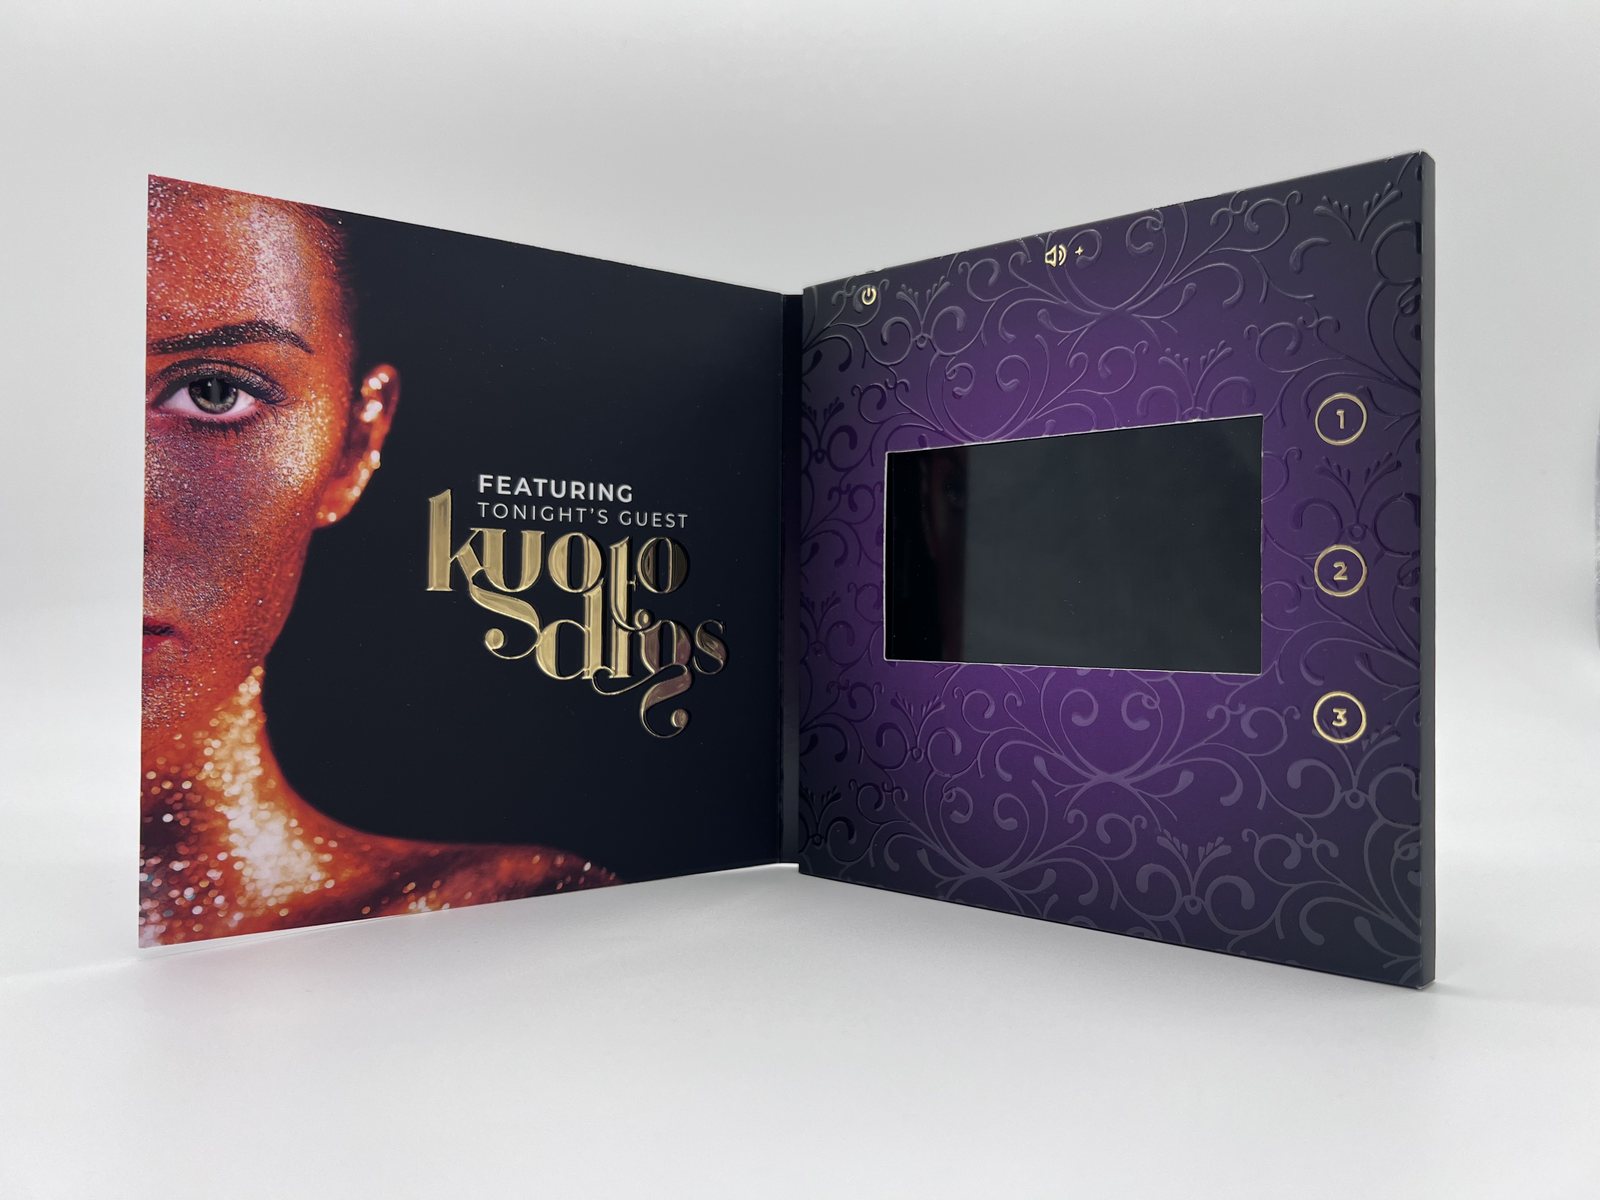
Printed sample of the video card standing open, with sample artwork on the cover and the screen inside
Product photo with foil and raised varnish, sample artwork I designed
02. The globe box

One sheet, one click: the box and its tray

I designed the retail box for globe, bigDAWGS’ own smart sockets, sold on Amazon. The brief: a box that holds the socket without a separate insert, at the lowest print cost per box.

The problem

A box with a separate insert means two print jobs, more sheets, and cutting and gluing. Each sheet of Invercote board costs about 50 cents, and production presses bill by the click, about 30 cents each: a sheet up to 19 inches long is one click, anything longer, up to 30 inches, is two. A box that doesn’t fit 13 by 19 costs twice as much to print.

What I designed

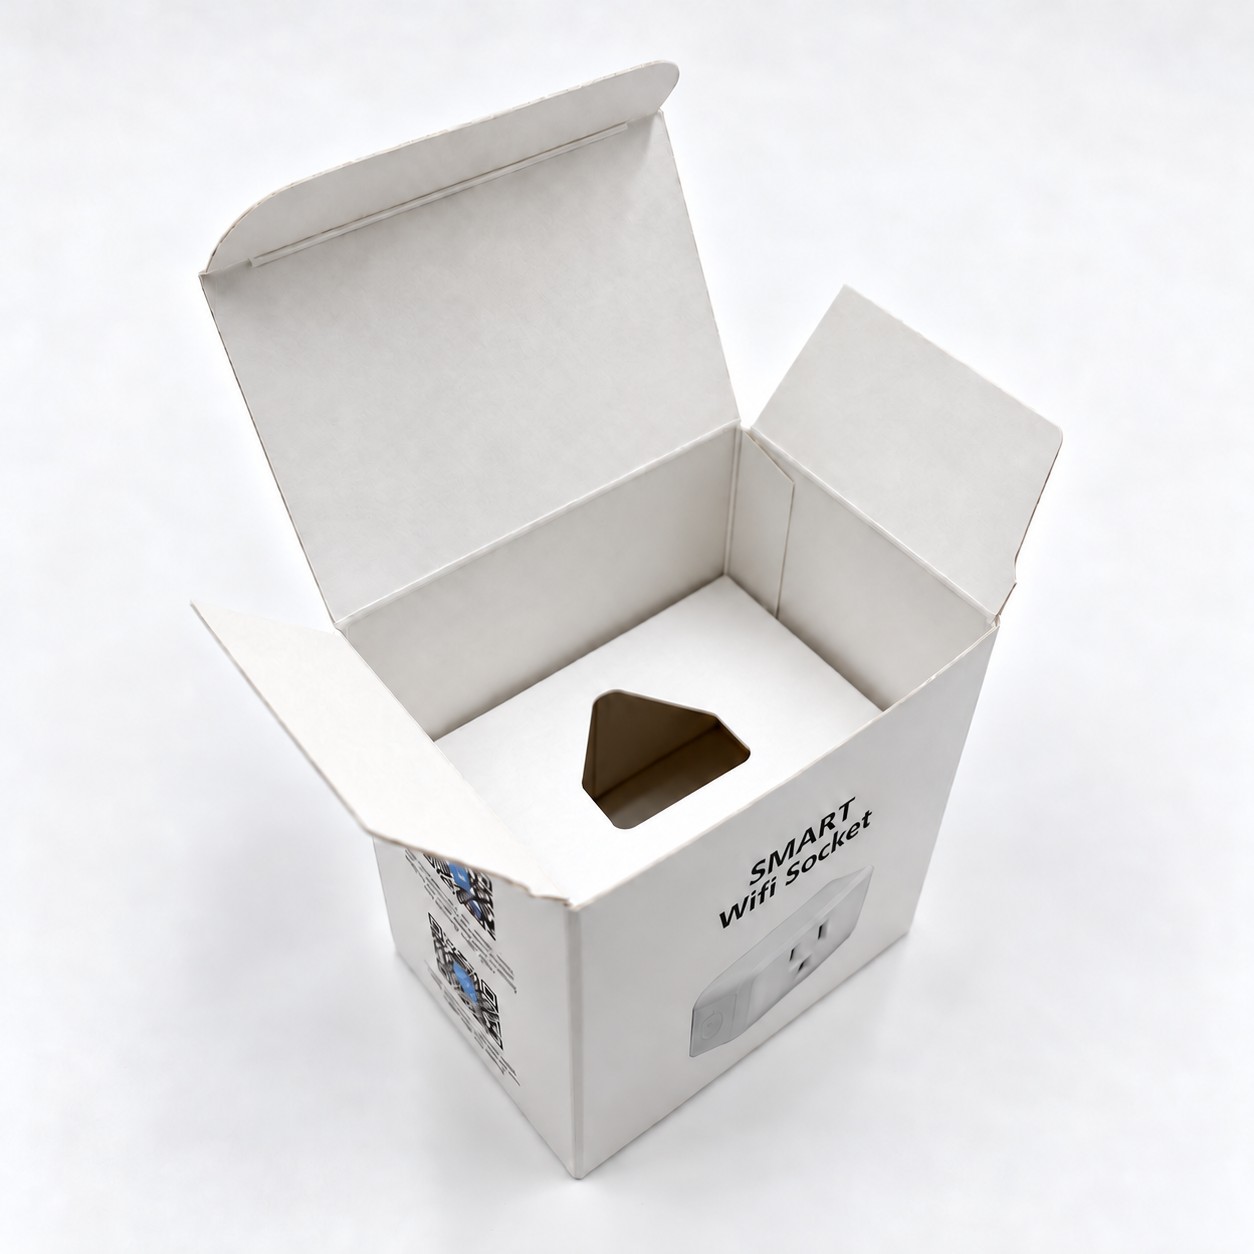
A tuck end carton with a hang tab, with the tray built into the same sheet. The tray folds down inside and holds the socket in a small cutout, so there’s no insert to print, cut or glue.

How I tested it

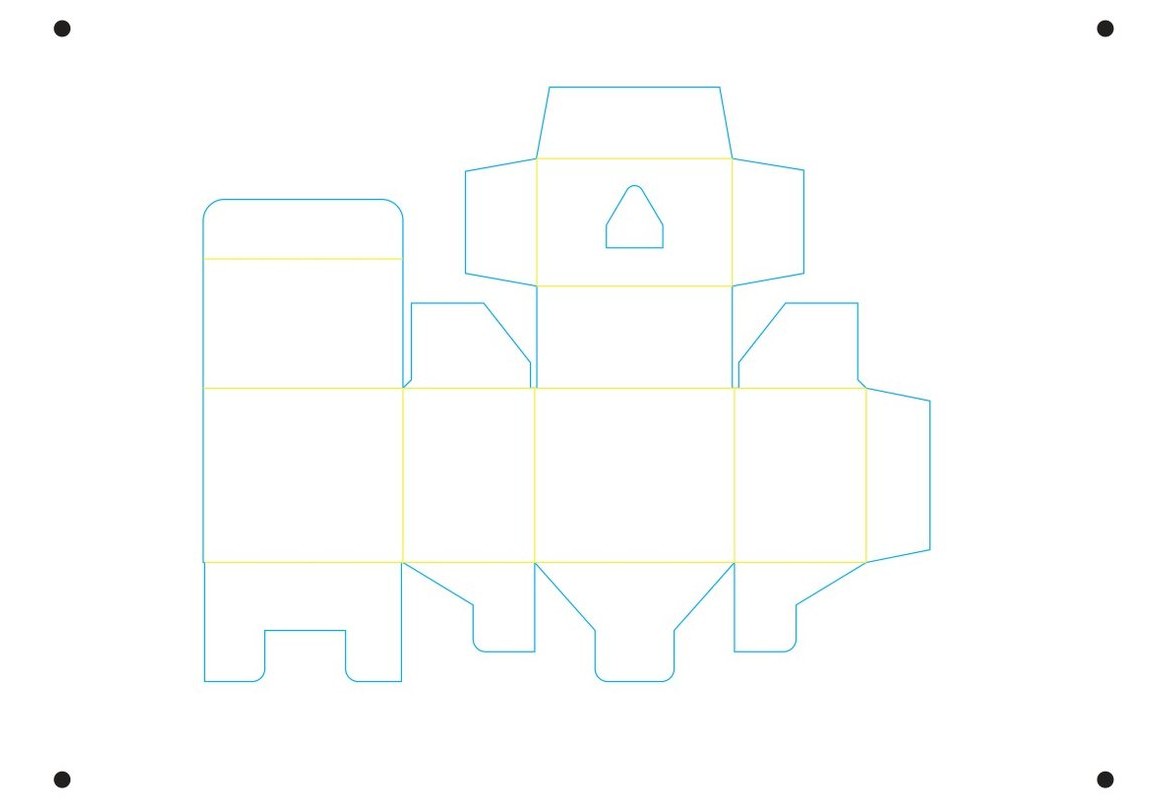
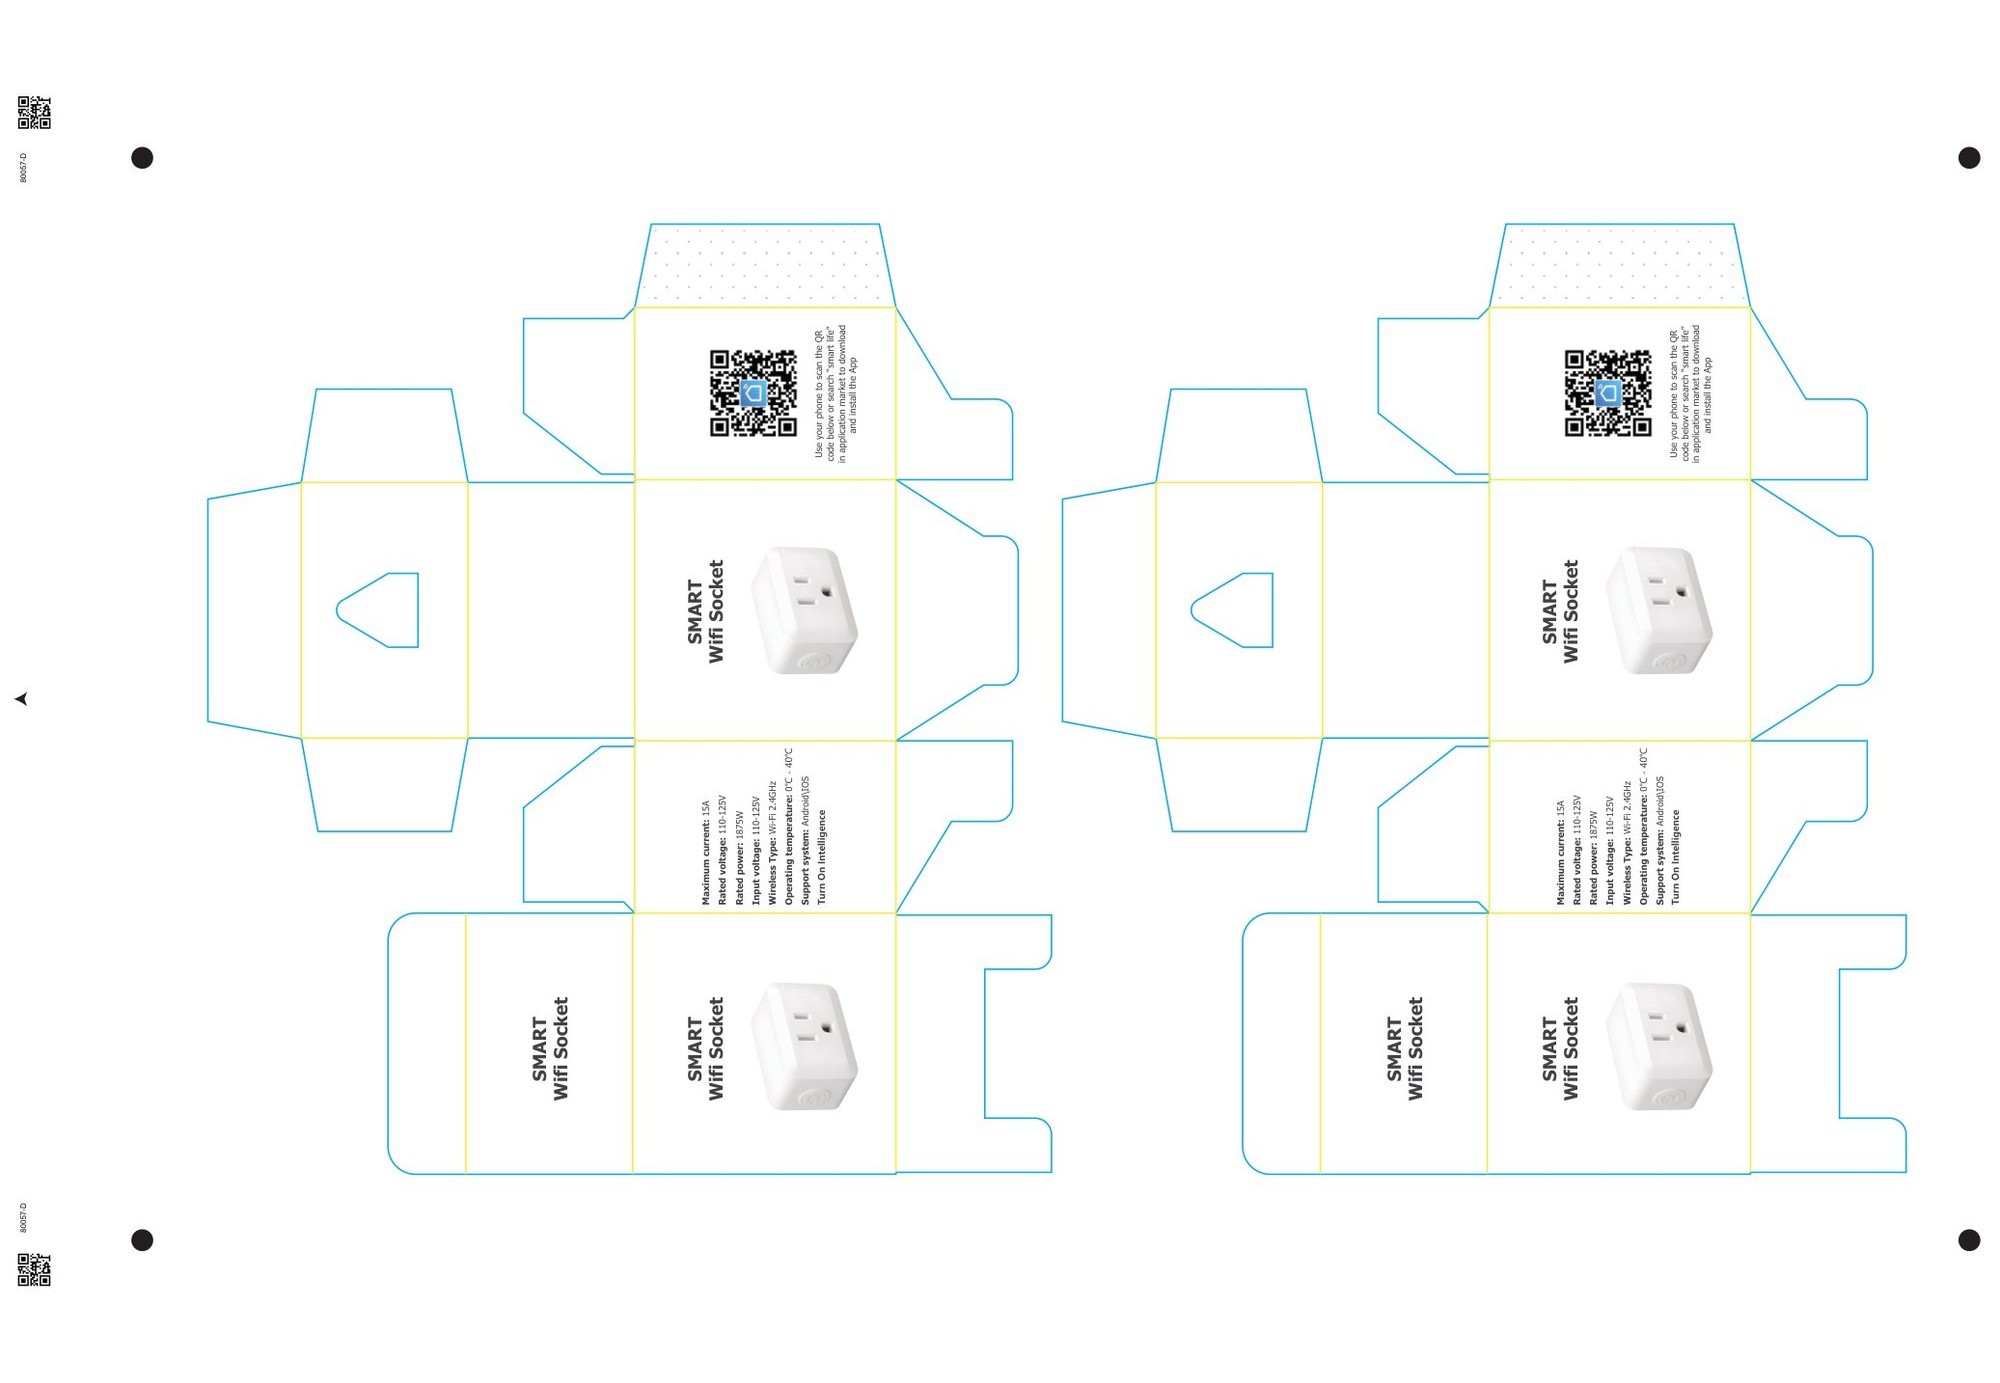
Three test cuts in about two weeks. The first box was a little too big for the socket, so I took 3 mm off for a snug fit, then set up the final sheet with two boxes on one 13 by 19 inch sheet.

The files

Die cut, crease, glue guide, QR code and feed direction layers, plus cutter files for our AOL and Skycut die cutters.

Result

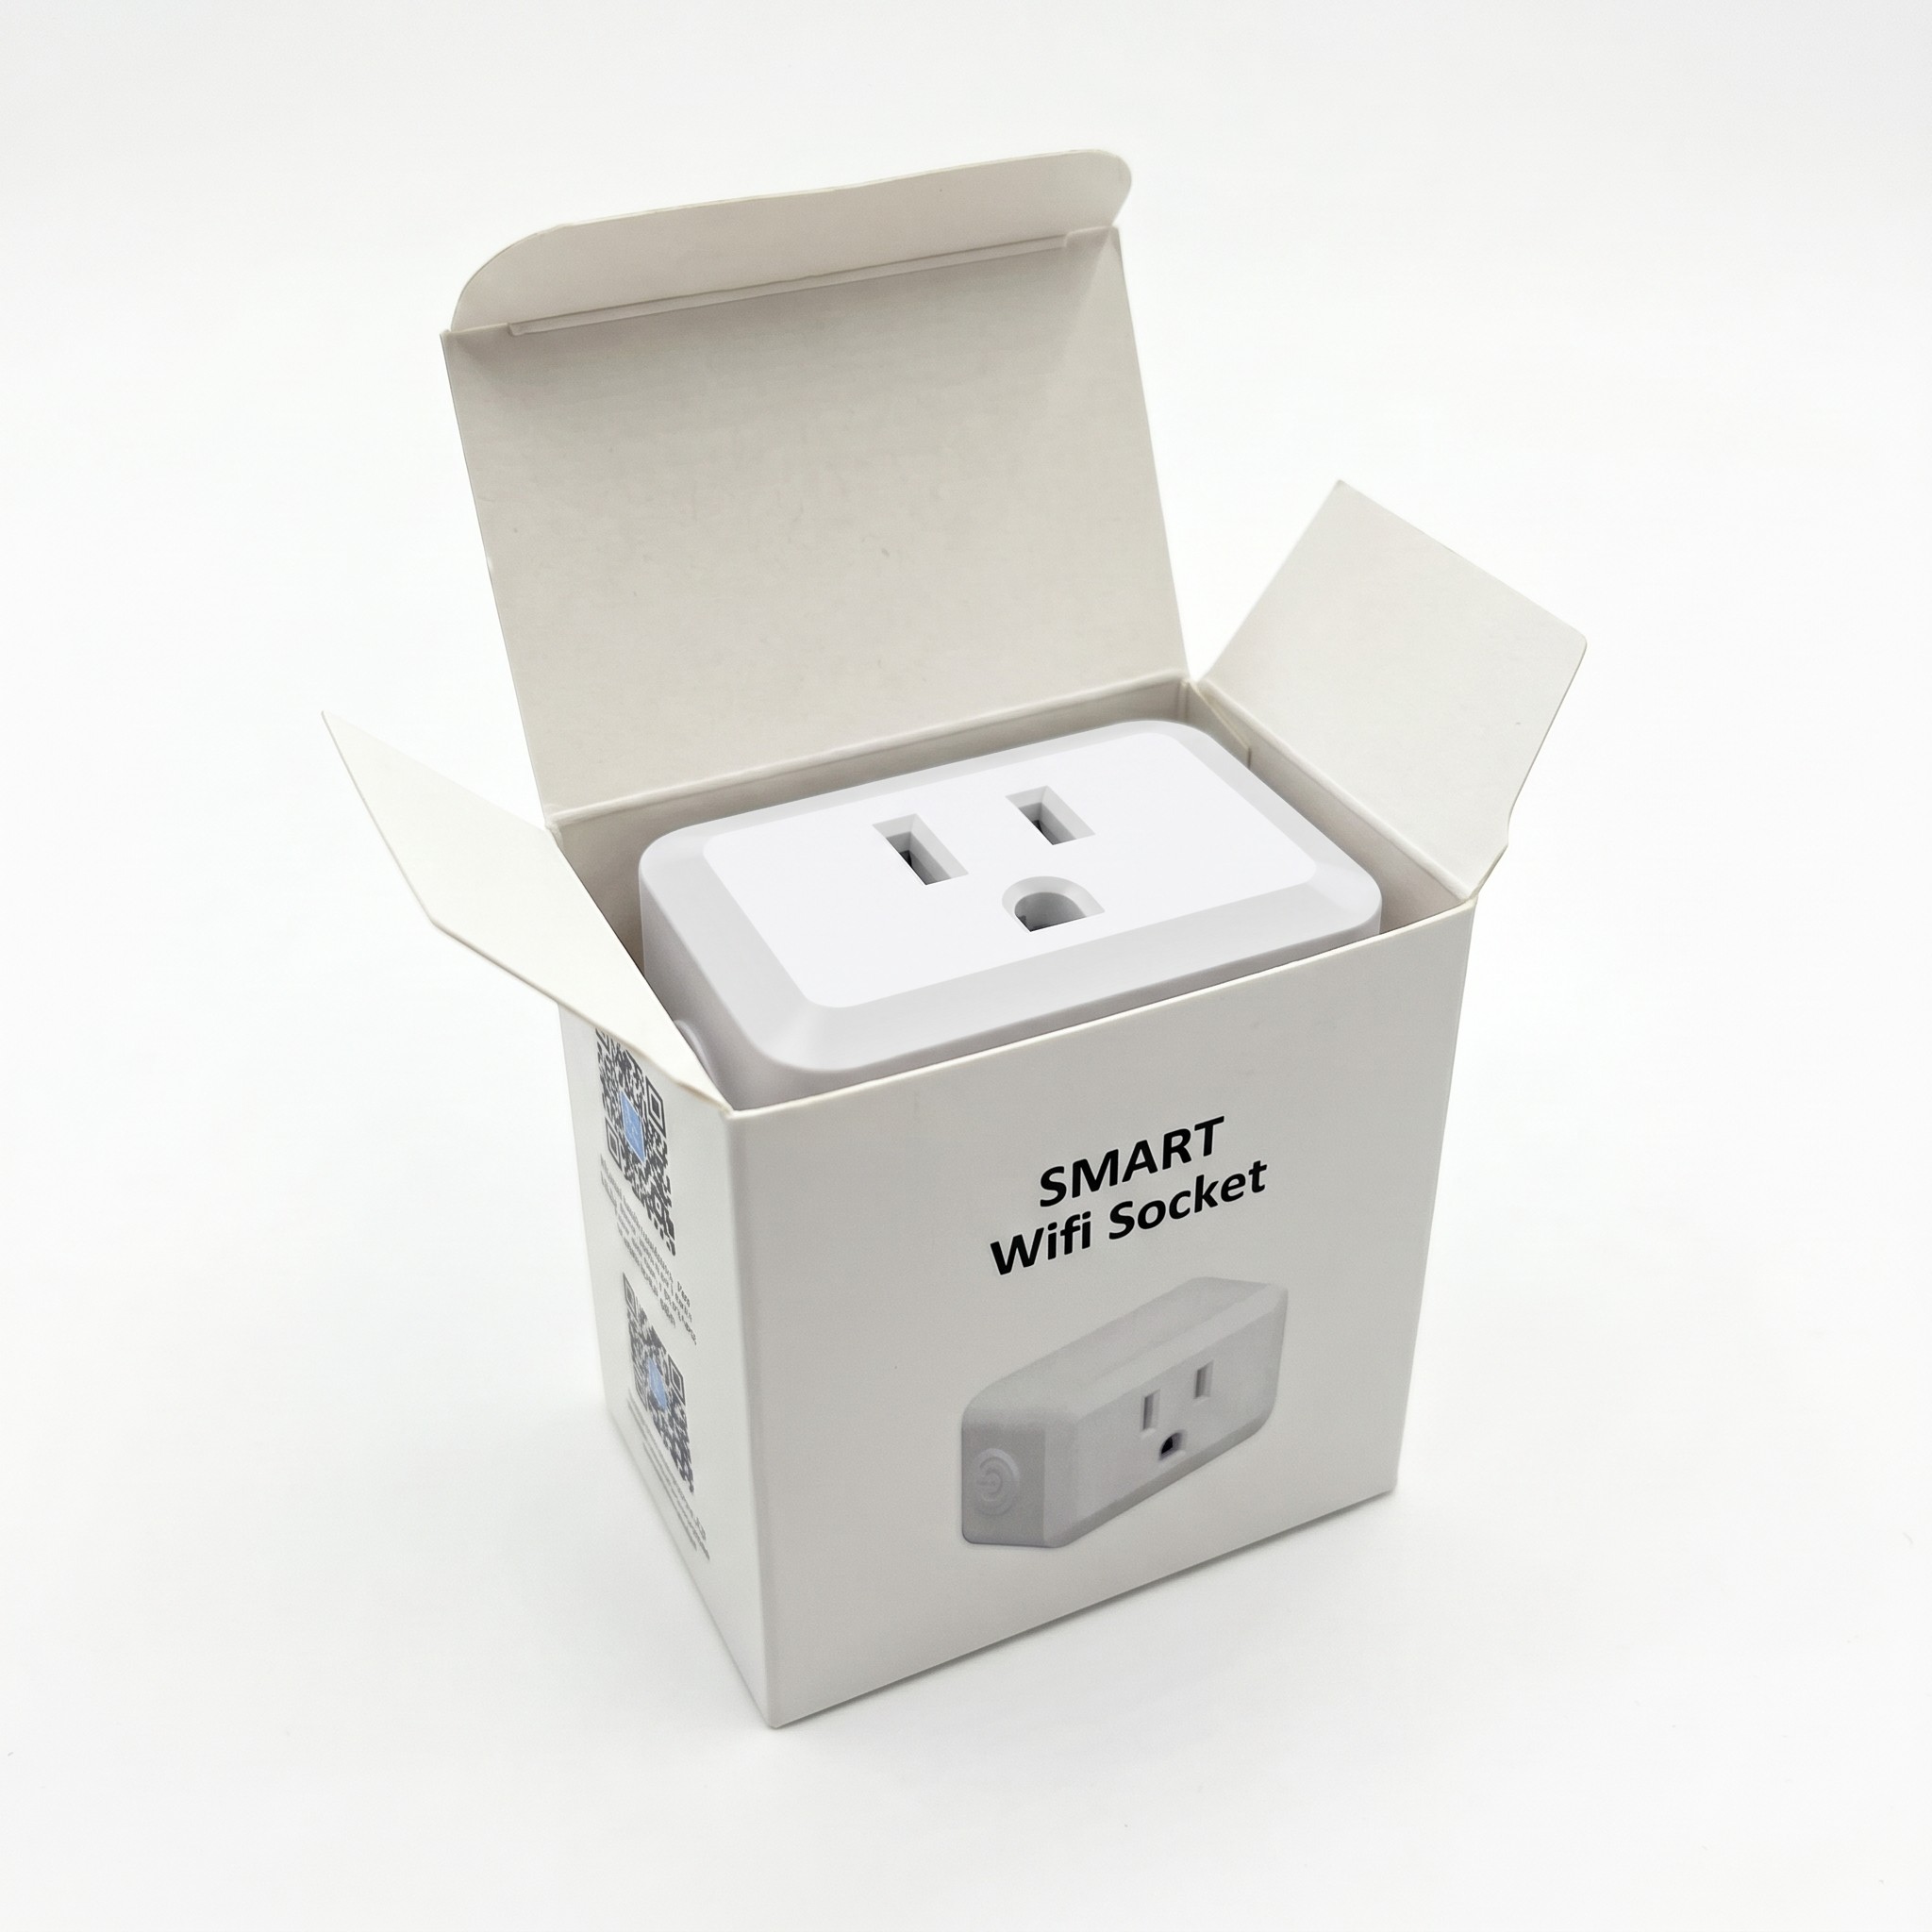
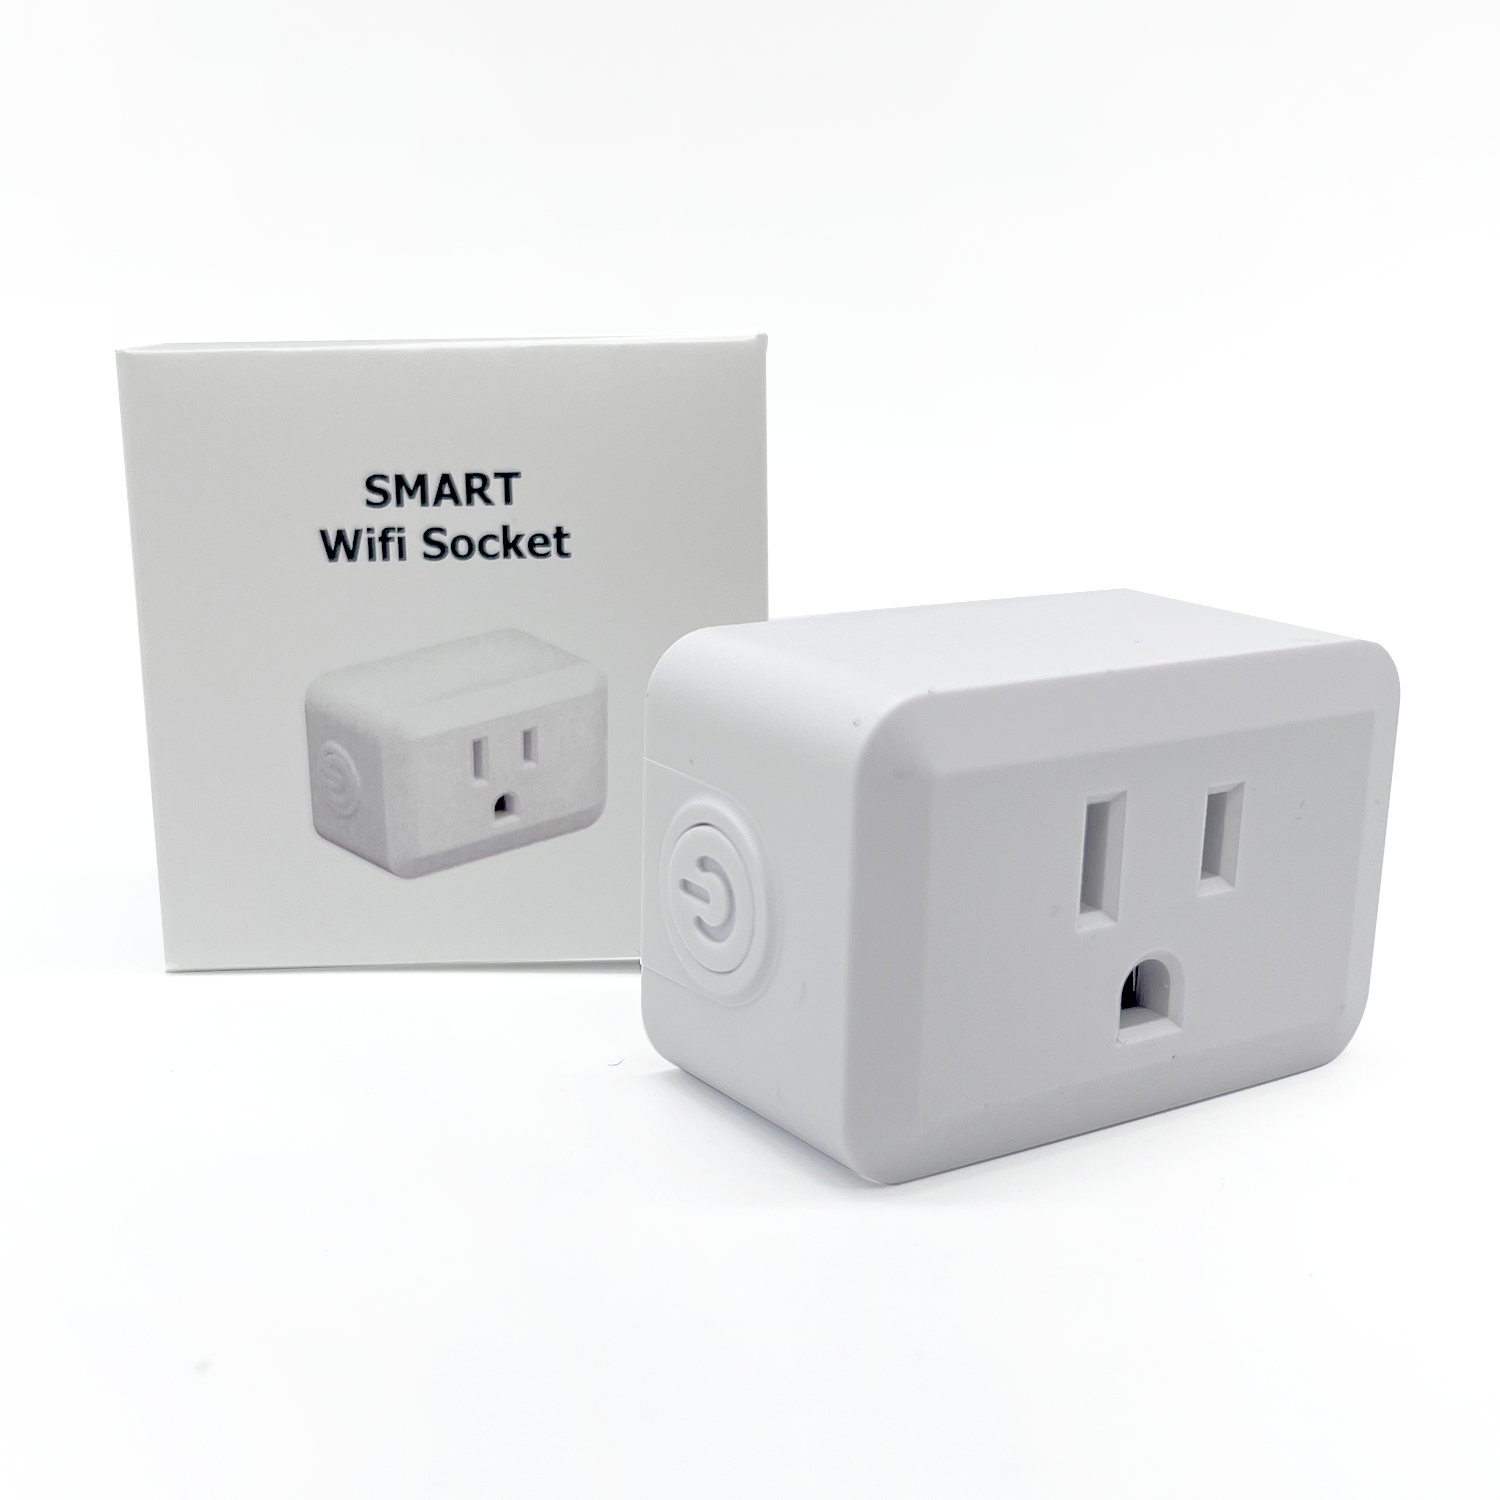
Two boxes on every 13 by 19 inch sheet of Invercote board, no inserts: half the board and half the toner per box. The globe socket sold on Amazon in this box.

The globe Smart Wifi Socket box open, with the socket held upright in the tray
The socket in its tray
The globe smart socket box open from above, with the tray folded in and its cutout ready for the socket
Empty, the tray folded in from the same sheet
Finished white box for a smart wifi socket, with the outlet beside it
Closed, beside the socket
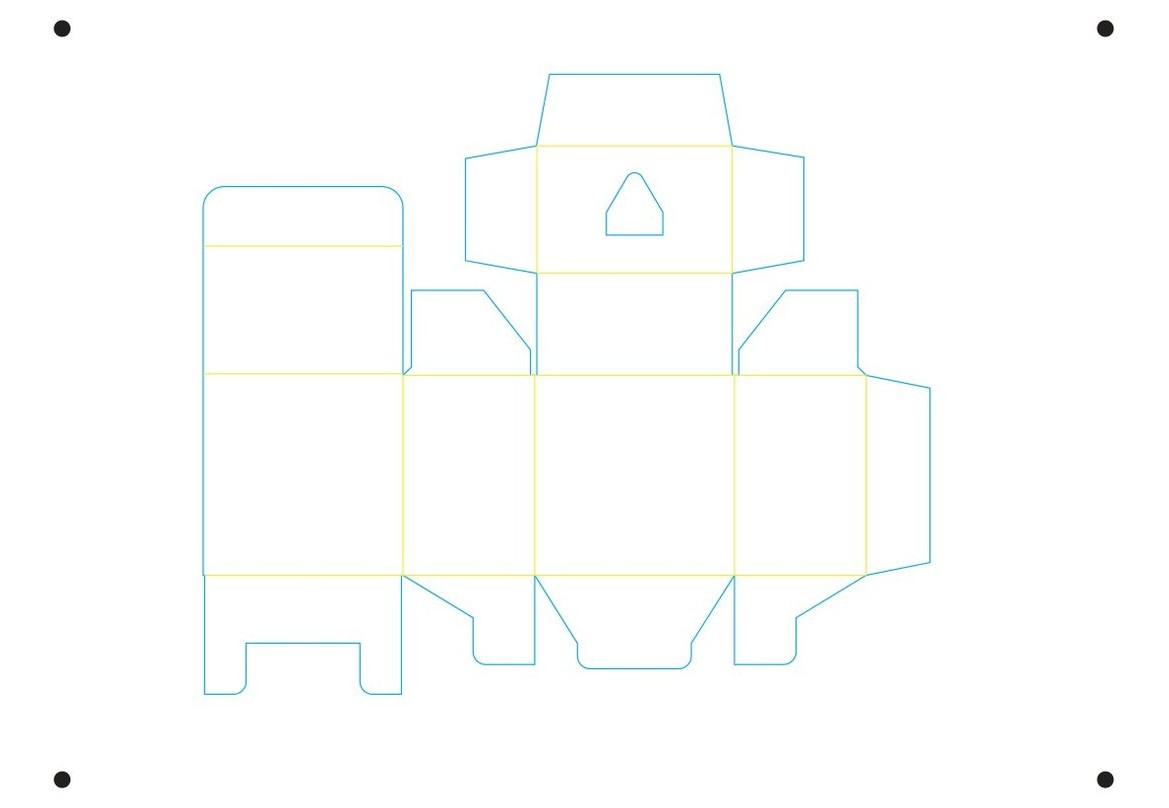
First test cut of the box dieline, with cut and crease lines
1. First test cut: a little too big for the socket
Second test cut of the box dieline
2. 3 mm smaller, for a snug fit
Final production sheet with two boxes on one 13 by 19 inch sheet, showing die cut and crease lines
3. Production sheet: two boxes on one 13 by 19 inch sheet
03. A client box line

One die for a whole product line

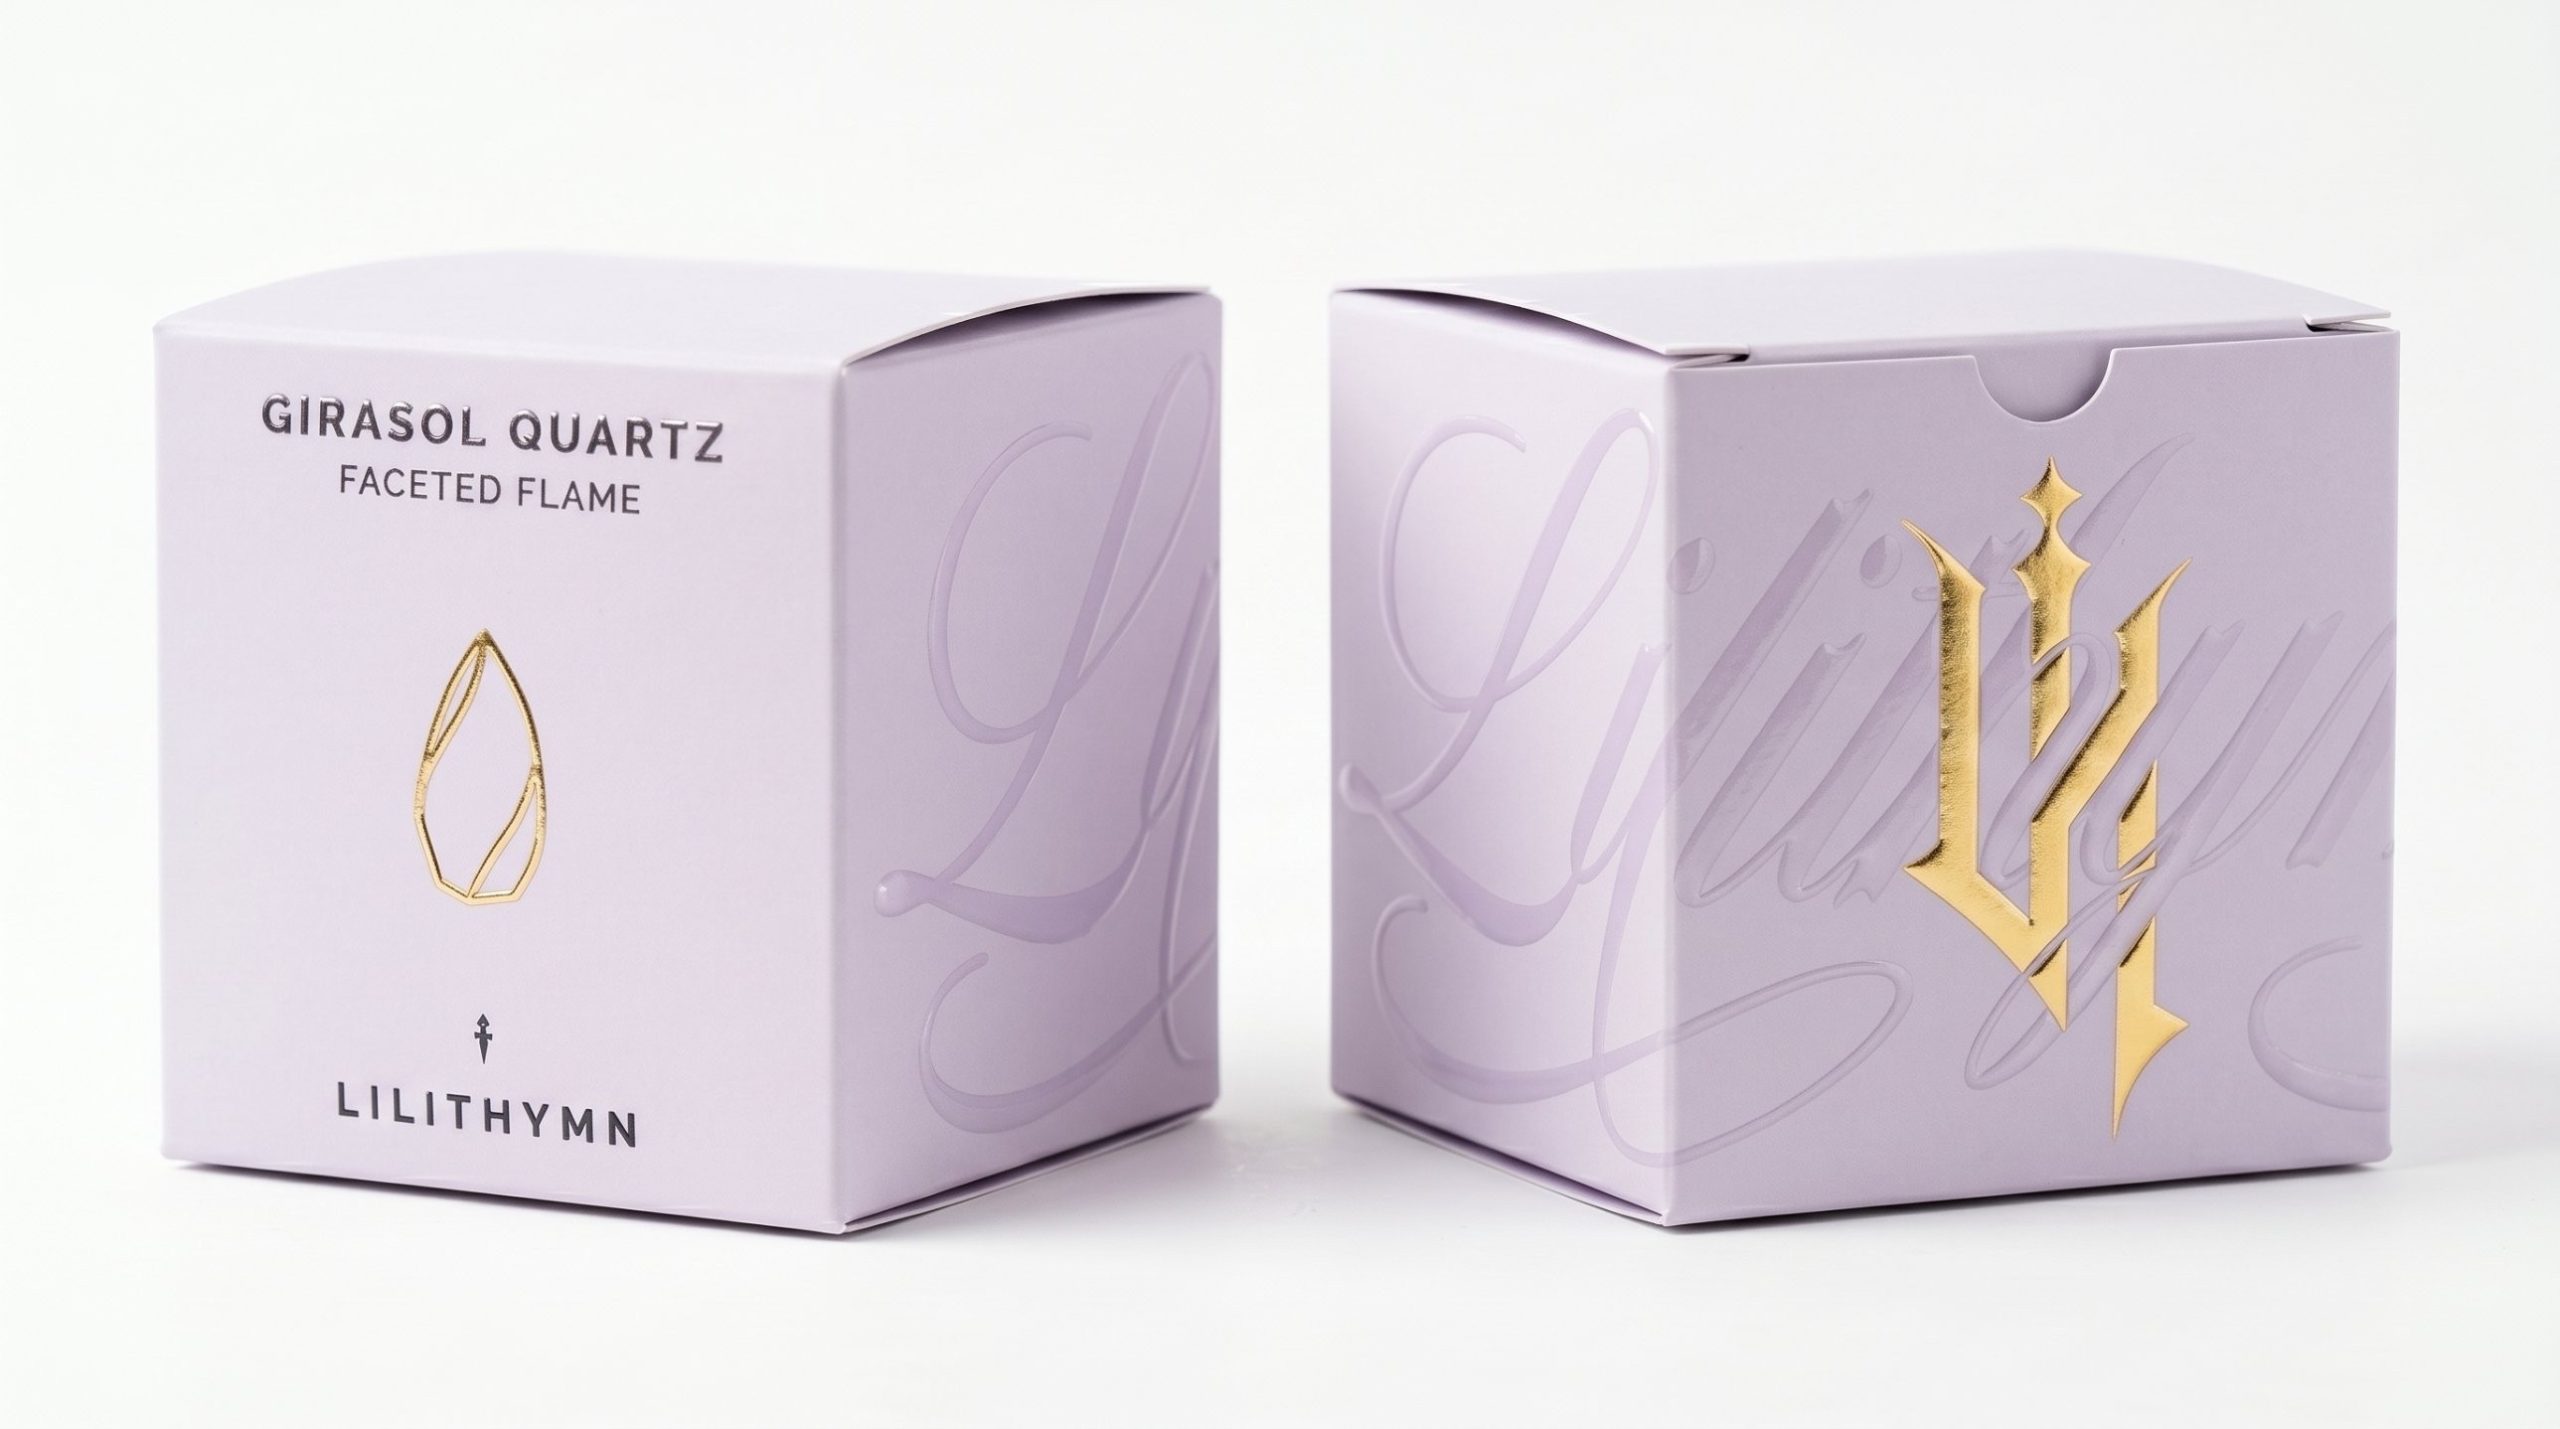
For a client, a crystal and candle brand, I designed a box line that runs on one die, with foil and raised varnish on every box.

Render of two lavender crystal boxes, one with the product name and a gold foil flame, one with a gold foil monogram over a raised varnish script
Render of the final design

The problem

A growing product line, each product needing its own box, without paying for a new die or rebuilding the files every time.

What I designed

One folding carton, about 3.4 inches on each side, one up on a 13 by 19 inch sheet, with a fixed layout. Only the colour, the crystal icon and the name change from product to product.

The finishes

Foil on the crystal icon and monogram, raised varnish on the script logo and product name. Some boxes also print on the inside.

The files

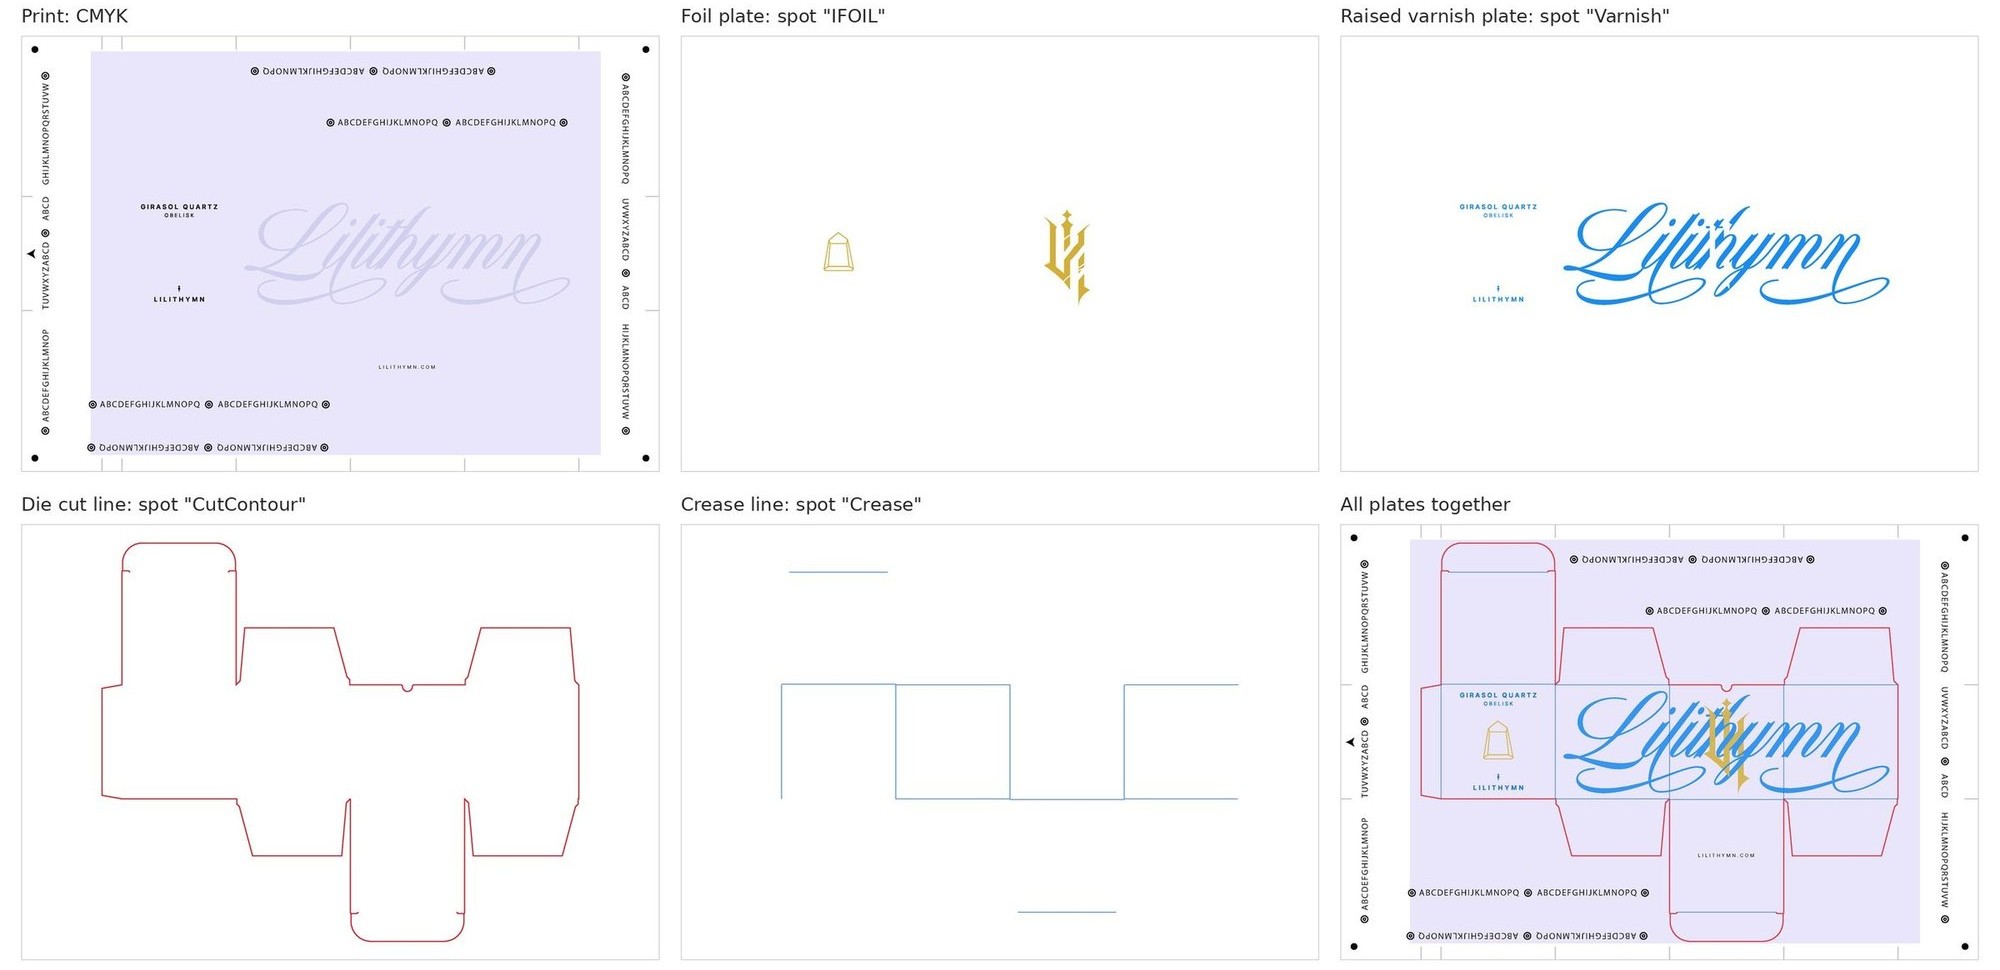
Each finish is its own spot colour (IFOIL, Varnish, CutContour, Crease), so the press and the die cutter each read only their own plate.

Result

In production. From the shop’s customer reviews: “Beautifully packaged and perfect for gift giving” and “packaged so elegantly.”

The plates for one box: CMYK print, foil plate, raised varnish plate, die cut line, crease line, and all of them together
The plates for one box
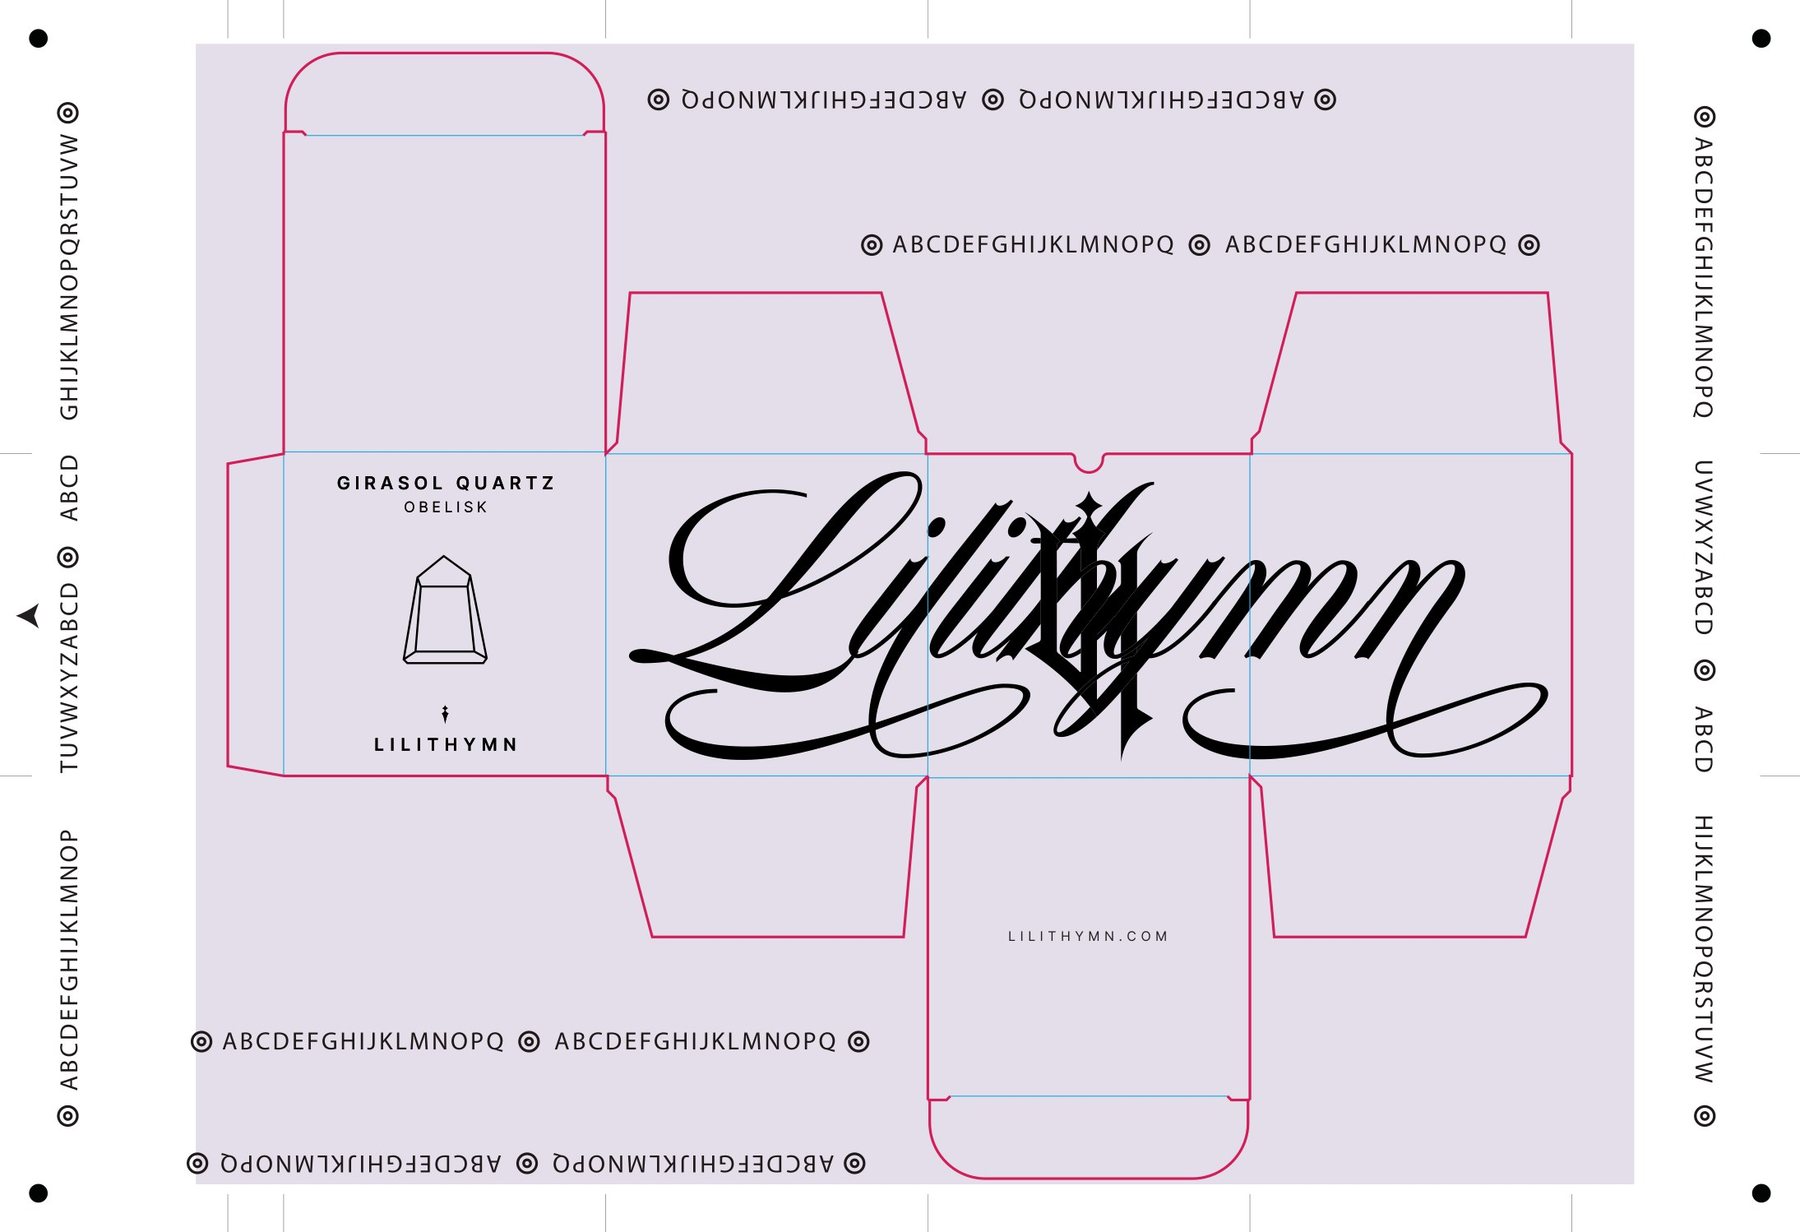
Flat box artwork with the dieline over it, lilac background, crystal icon and product name
Same die, product one
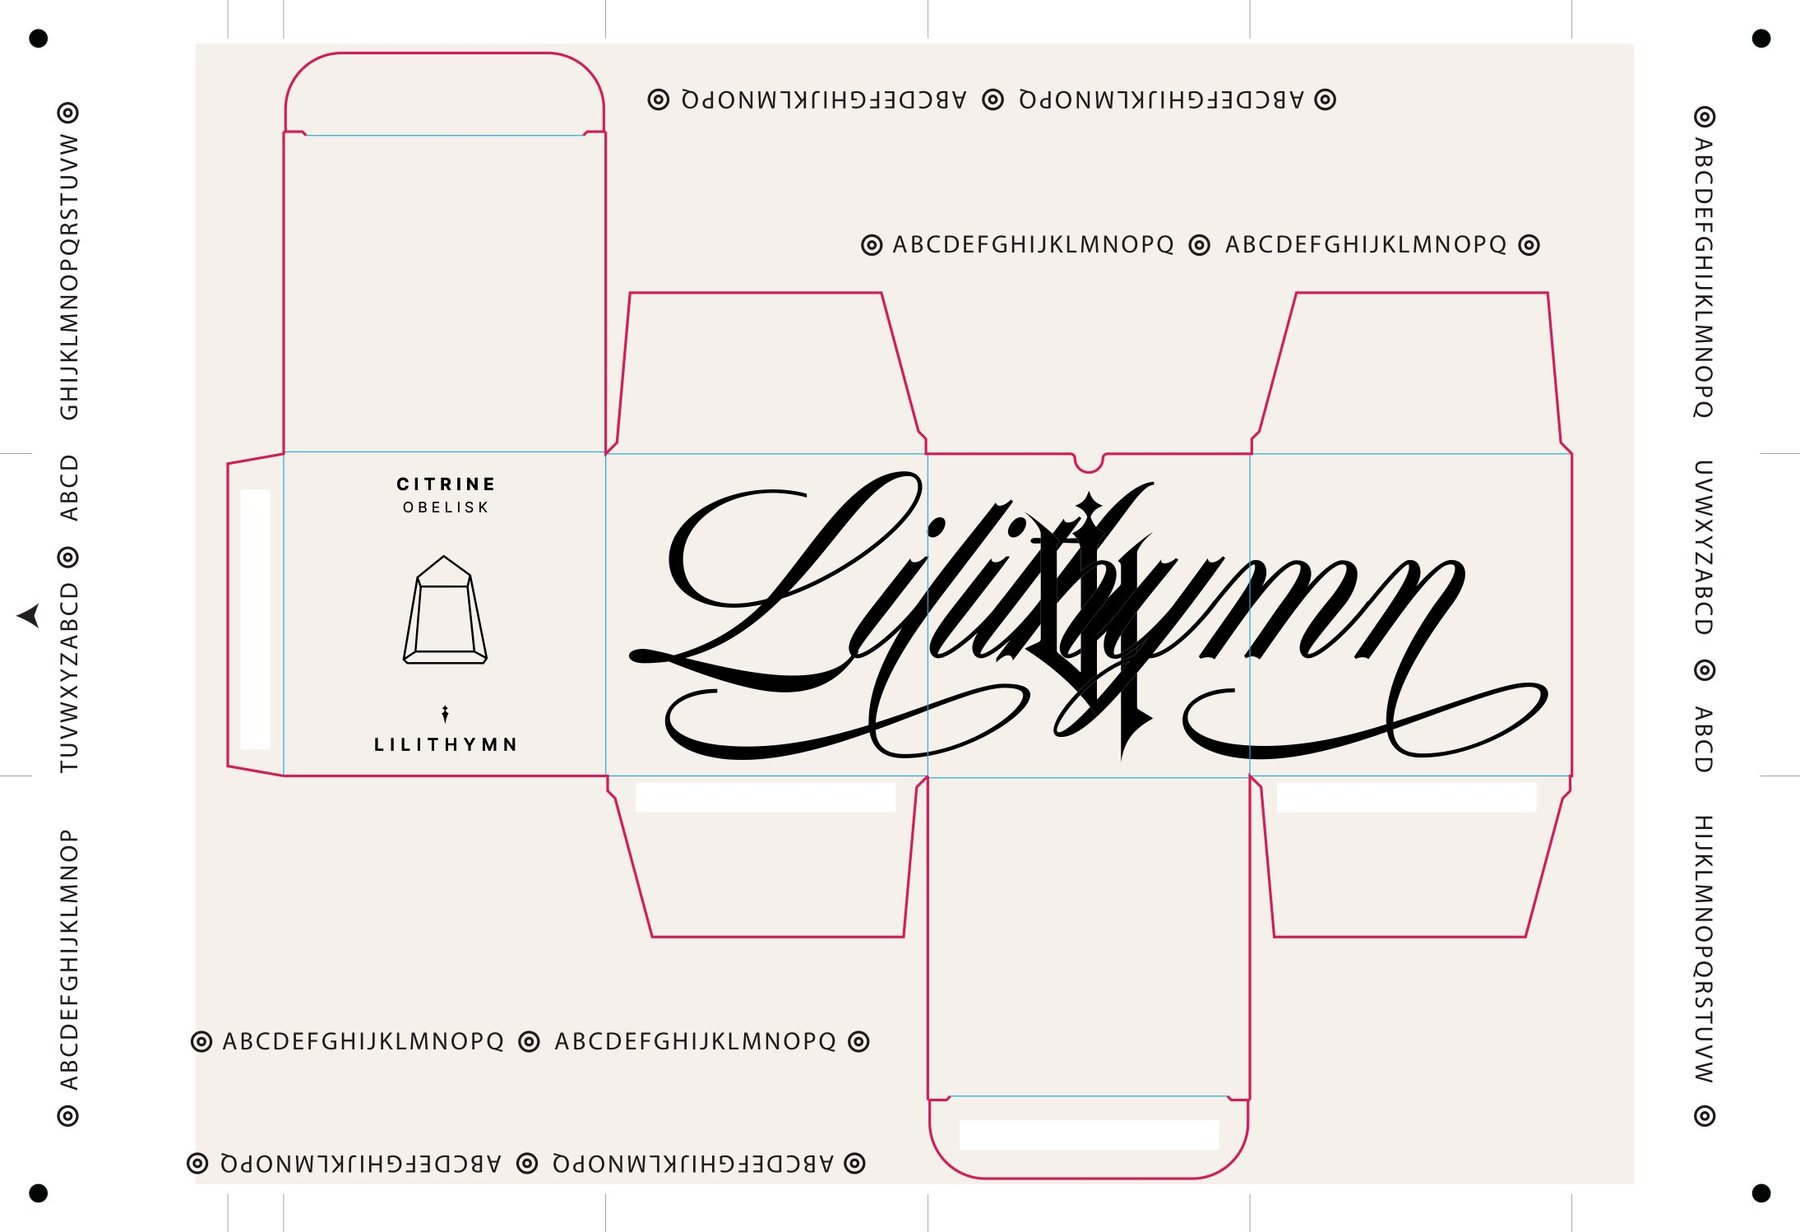
Same box die with a cream background and a different crystal icon and product name
Product two
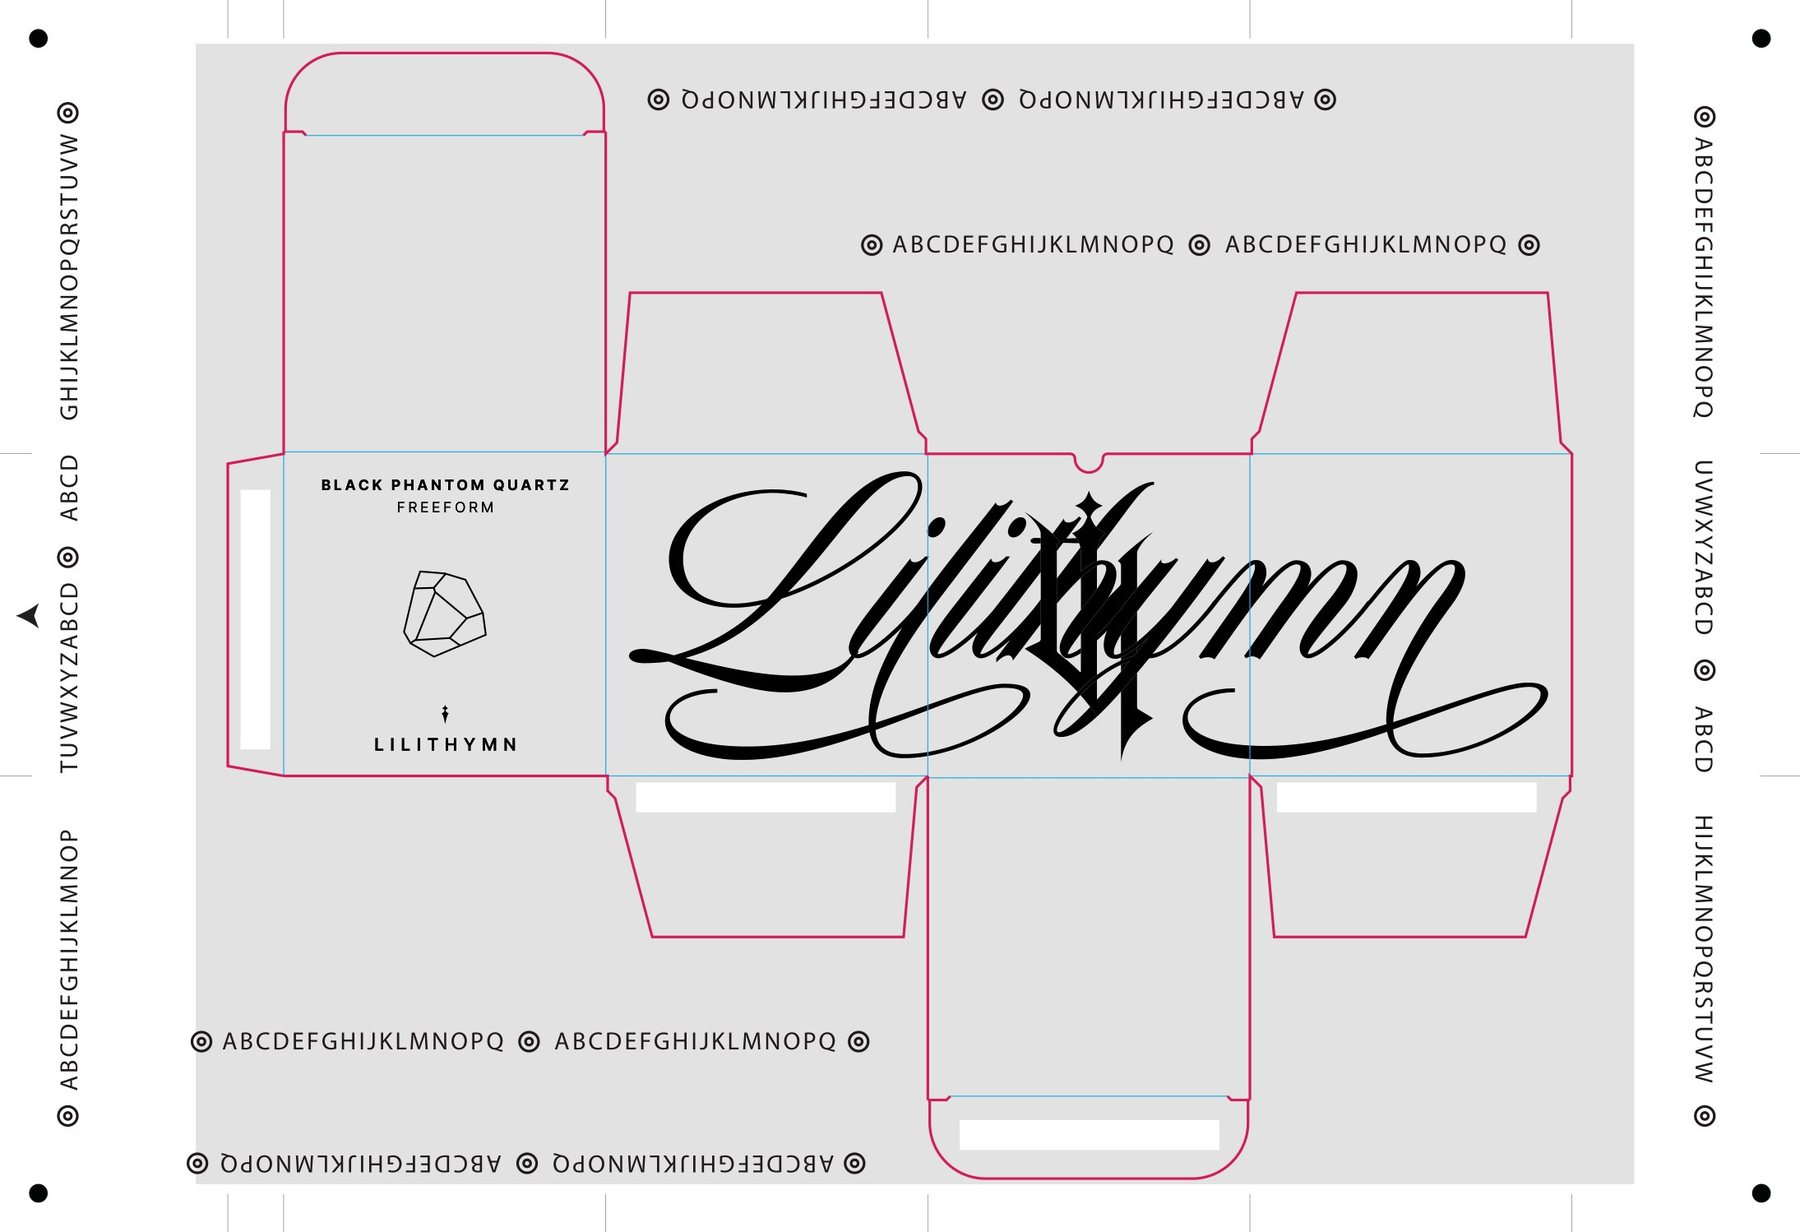
Same box die with a grey background and a different crystal icon and product name
Product three
04. Finishing R&D

Testing what foil and varnish can do

Alongside client work, I built test pieces to learn exactly what our foil and varnish setup could do before we offered it to clients. A cheaper way to make any colour holographic, a swatch book of thirteen foils, and a card that stacks four foil passes in register.

Finishing R&D · 1 of 3

The foil hack: any colour, holographic

The problem

Metallic effects in any colour usually need white toner or a licensed system like Color-Logic, and foil only comes in the colours suppliers sell. Our Konica Minolta press has no white station.

What I found

Soft touch lamination over holographic foil turns it almost white, and printing on top of the lamination makes it go clear again, so the foil shows through only where the second pass lands.

How it runs

Pass 1 prints the art on holographic foil stock. Soft touch lamination mutes the foil. Pass 2 prints on top in register, in toner or in raised varnish on the MGI, which made the holographic pop the most.

Result

Any colour our presses can print can come out raised, metallic and holographic, without white toner or supplier foils. I built it into our hot lamination workflow to keep it cheap to produce.

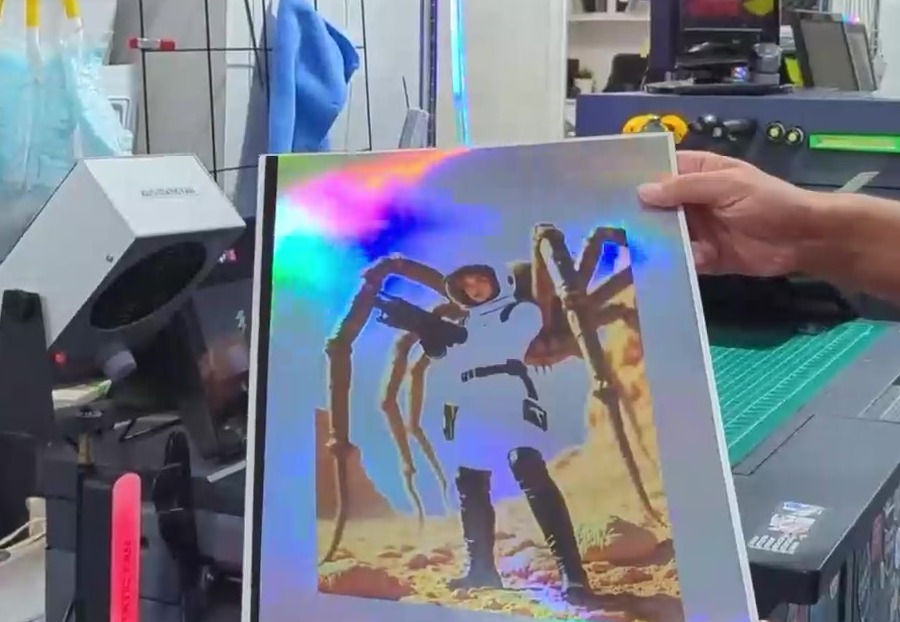
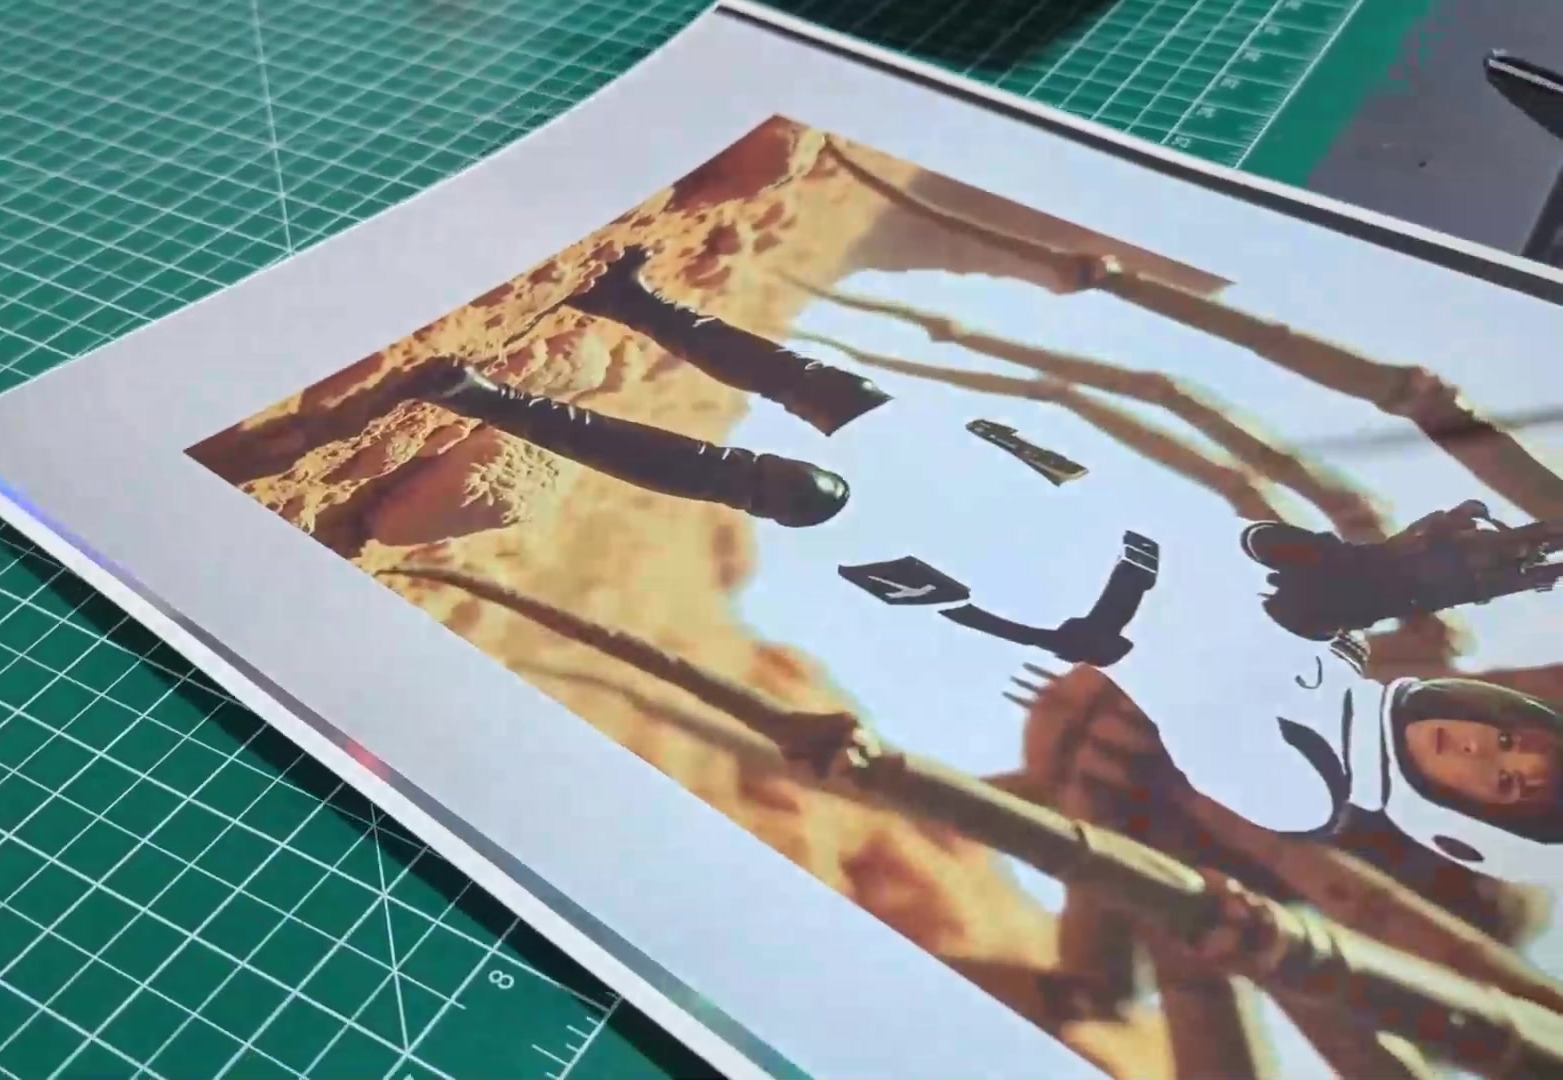
Close up of a printed astronaut with a holographic sheen across the suit and helmet
The finished print, up close
First pass printed on a holographic foil sheet, the foil still showing where the art leaves it open
1. Pass 1 printed on holographic foil
The same sheet after soft touch lamination, the holographic foil muted to near white
2. Soft touch lamination mutes the foil
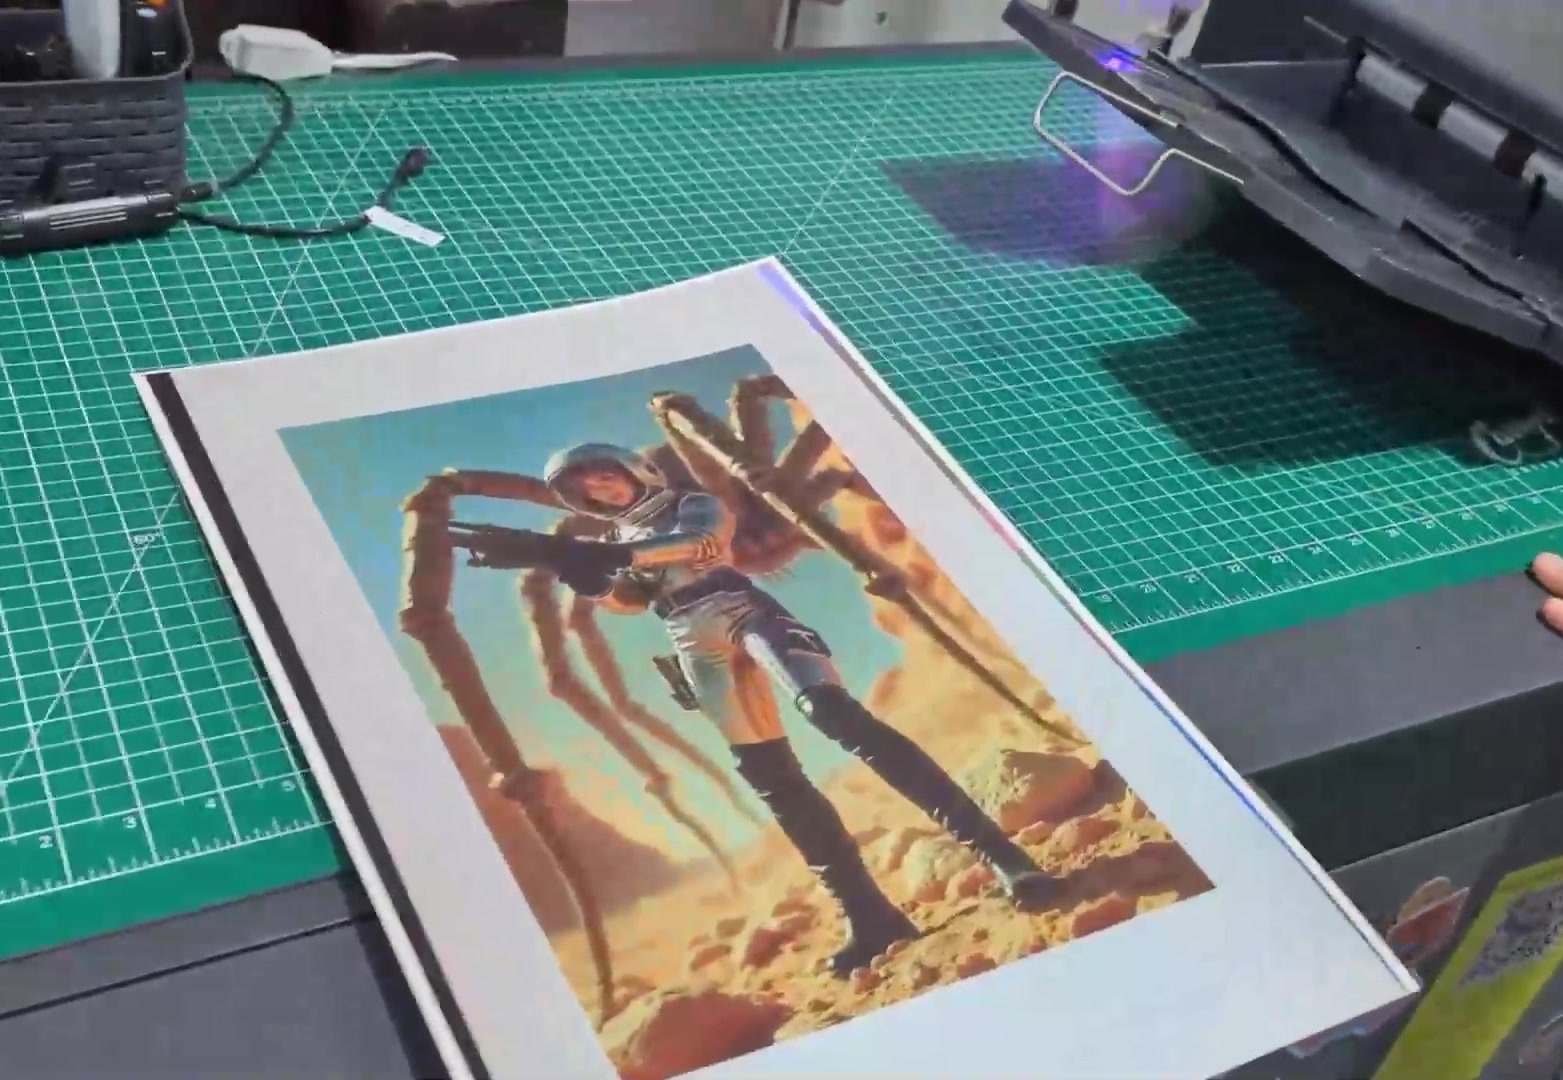
The finished sheet on a cutting mat after the second pass, printed in register over the laminated foil
3. Pass 2 printed on top, in register
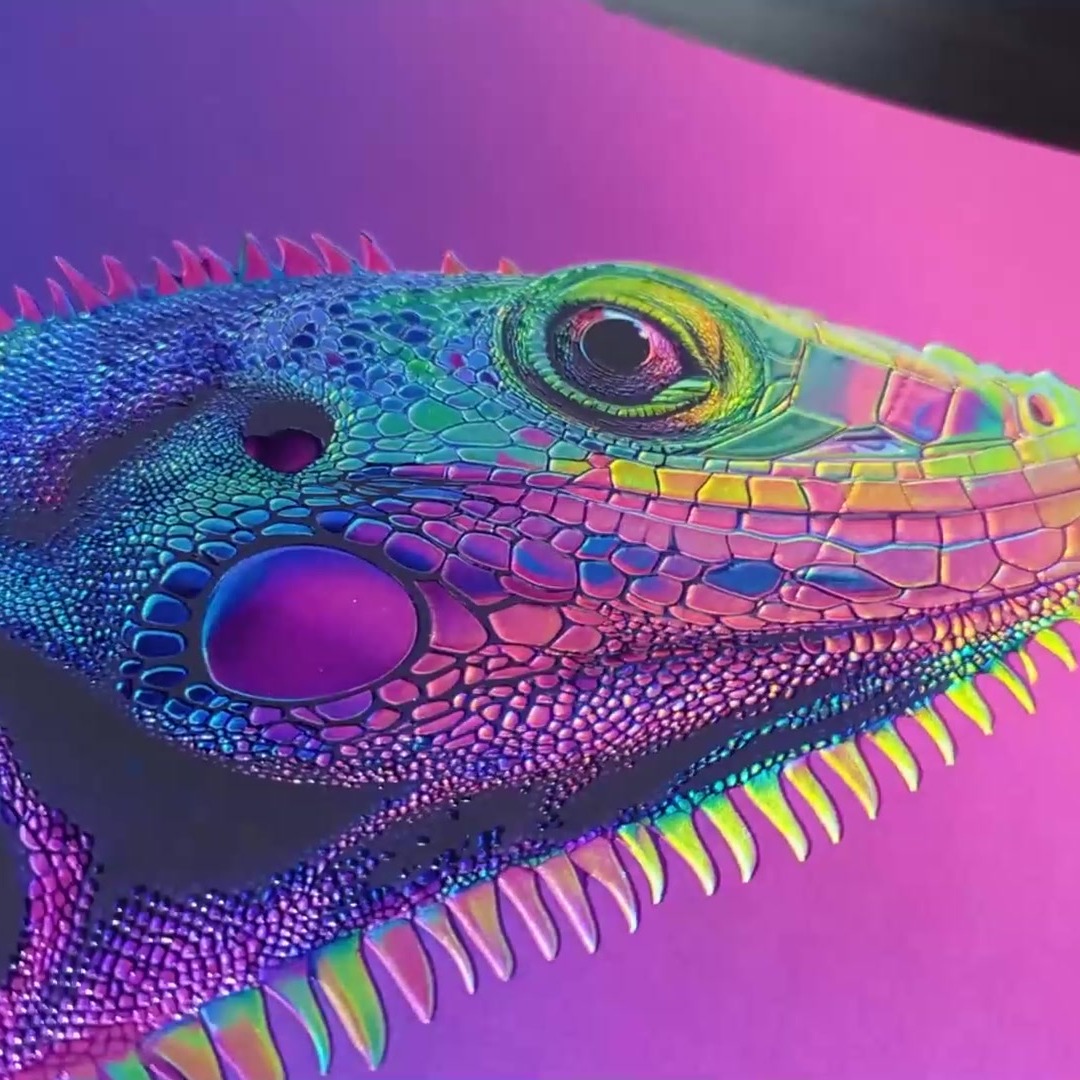
Close up of a printed lizard with raised holographic scales on a pink background
Raised varnish as the second pass
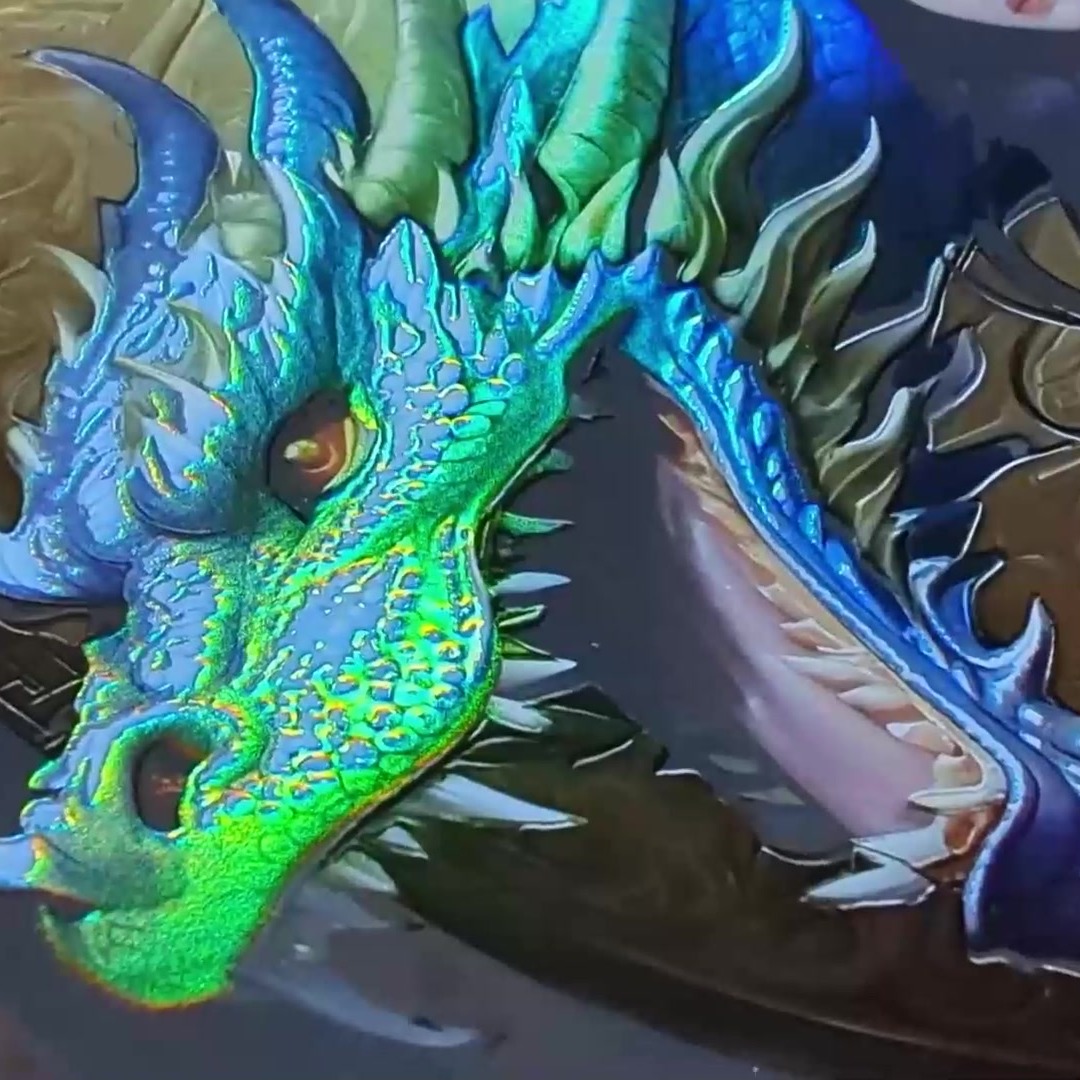
Close up of a printed blue dragon head with raised holographic scales
Same method on a darker print
Finishing R&D · 2 of 3

The swatch book: thirteen foils, one test pattern

What it is

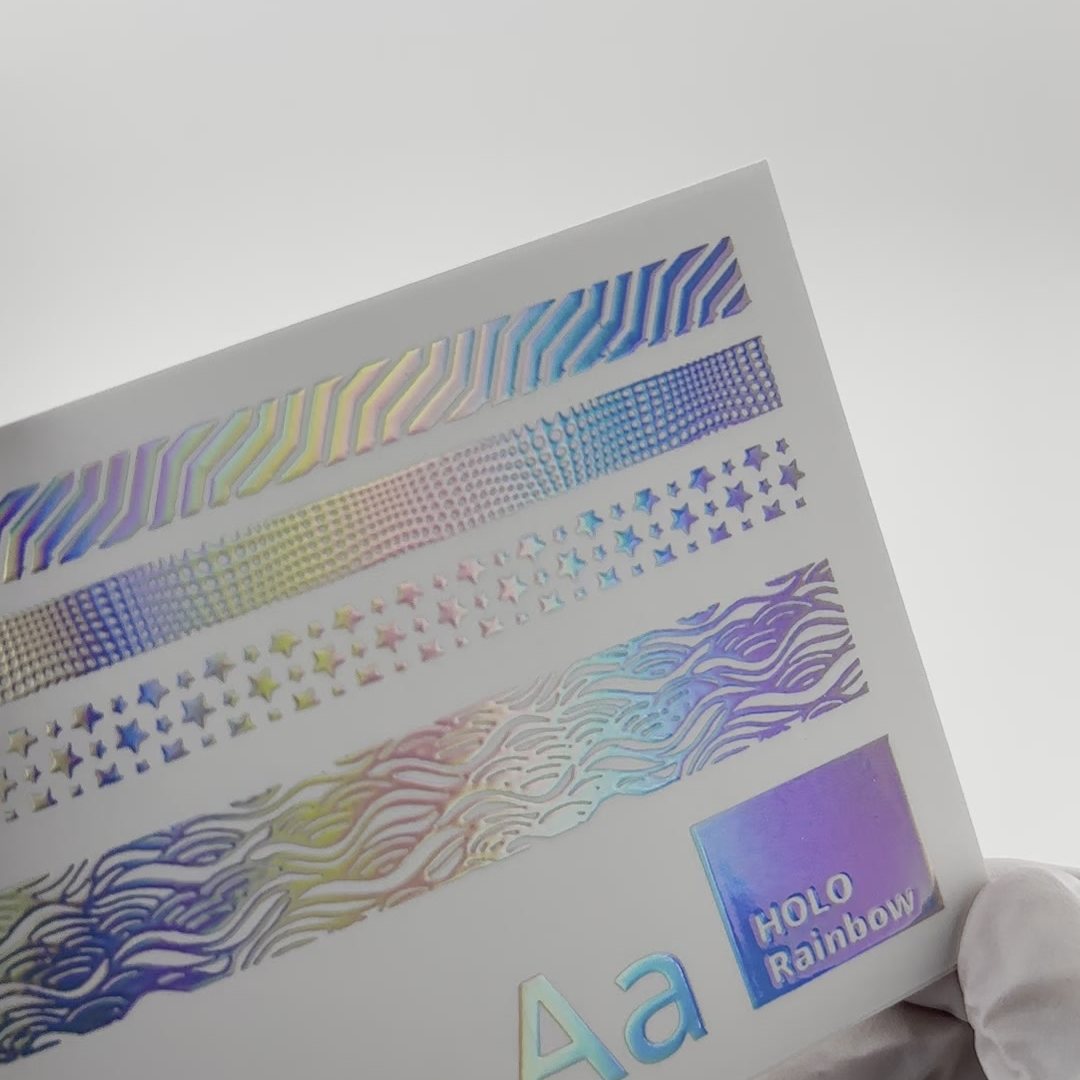
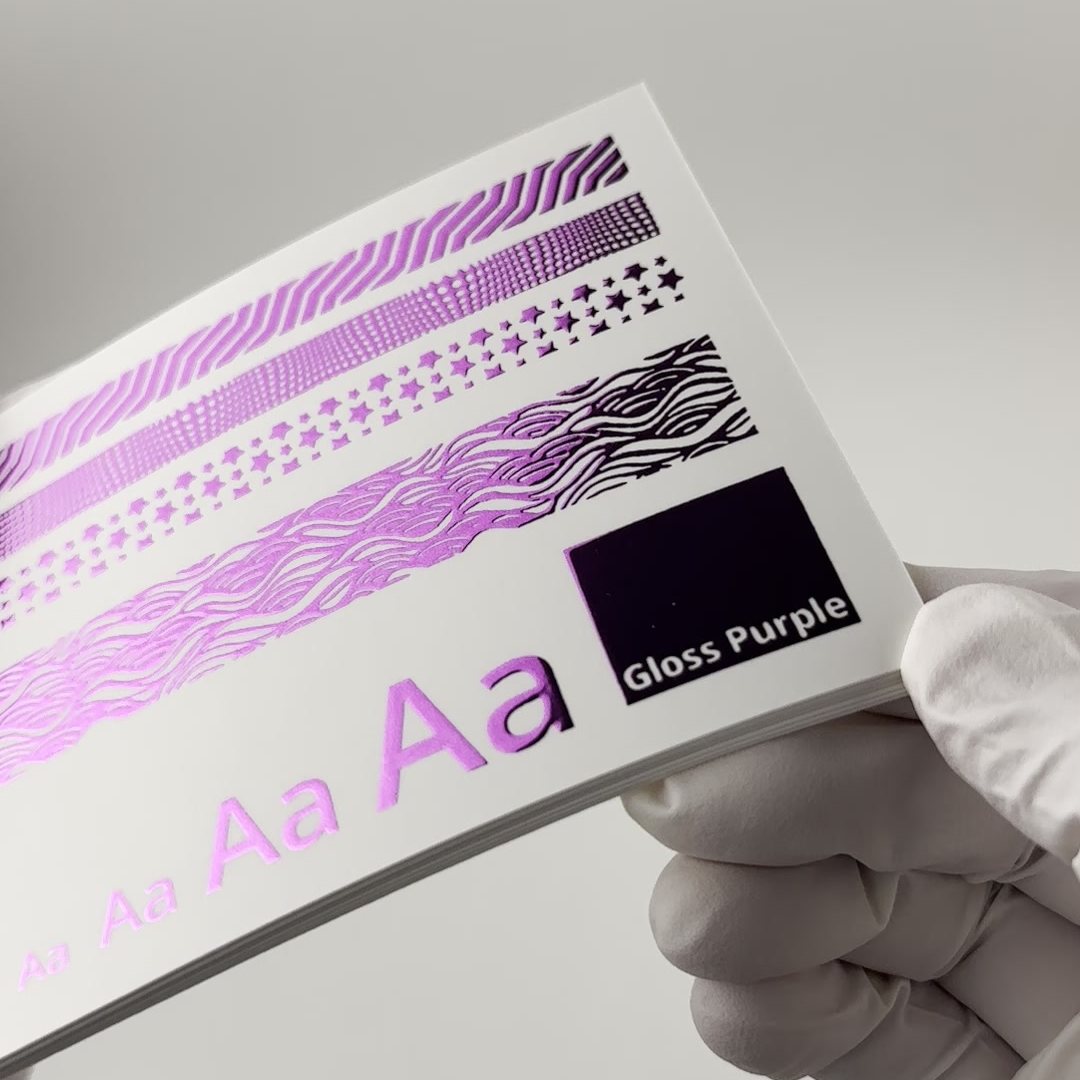
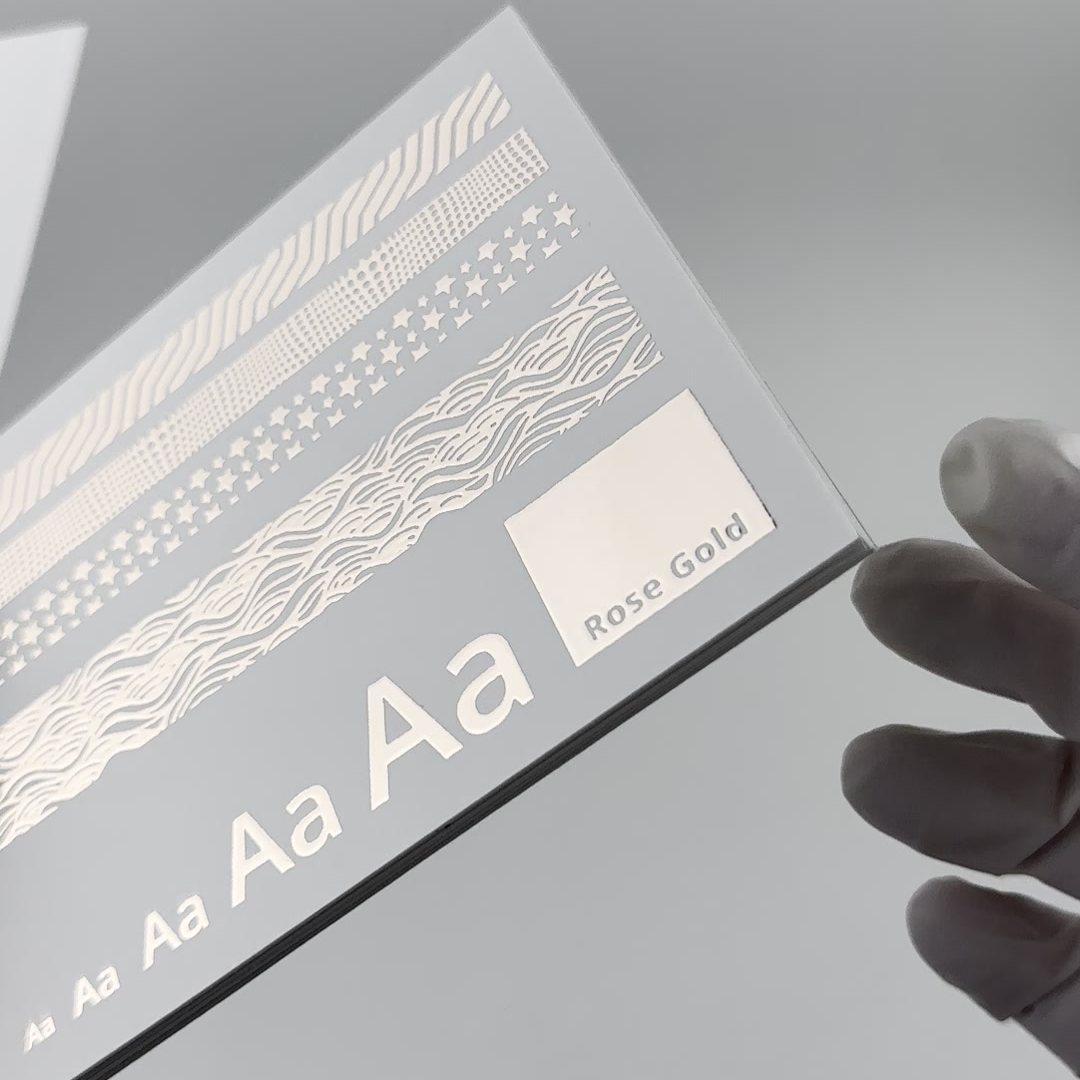
Thirteen raised foils, from copper and holo rainbow to matte silver, each on the same 4.5 by 3.5 inch test card.

The test card

I designed the pattern to show how fine a detail our raised foil can hold: thin wave lines, dot gradients, small stars, hairlines, a solid block and type at five sizes. The same design runs on every card, so the foils compare like for like.

Foil swatch card in holo rainbow foil, showing wave lines, dot gradients, stars and type at several sizes
Holo rainbow swatch card
Foil swatch card in gloss purple foil, held in a gloved hand
Gloss purple
Foil swatch card in rose gold foil, held in a gloved hand
Rose gold
Finishing R&D · 3 of 3

The four pass card: foil held in register

What it shows

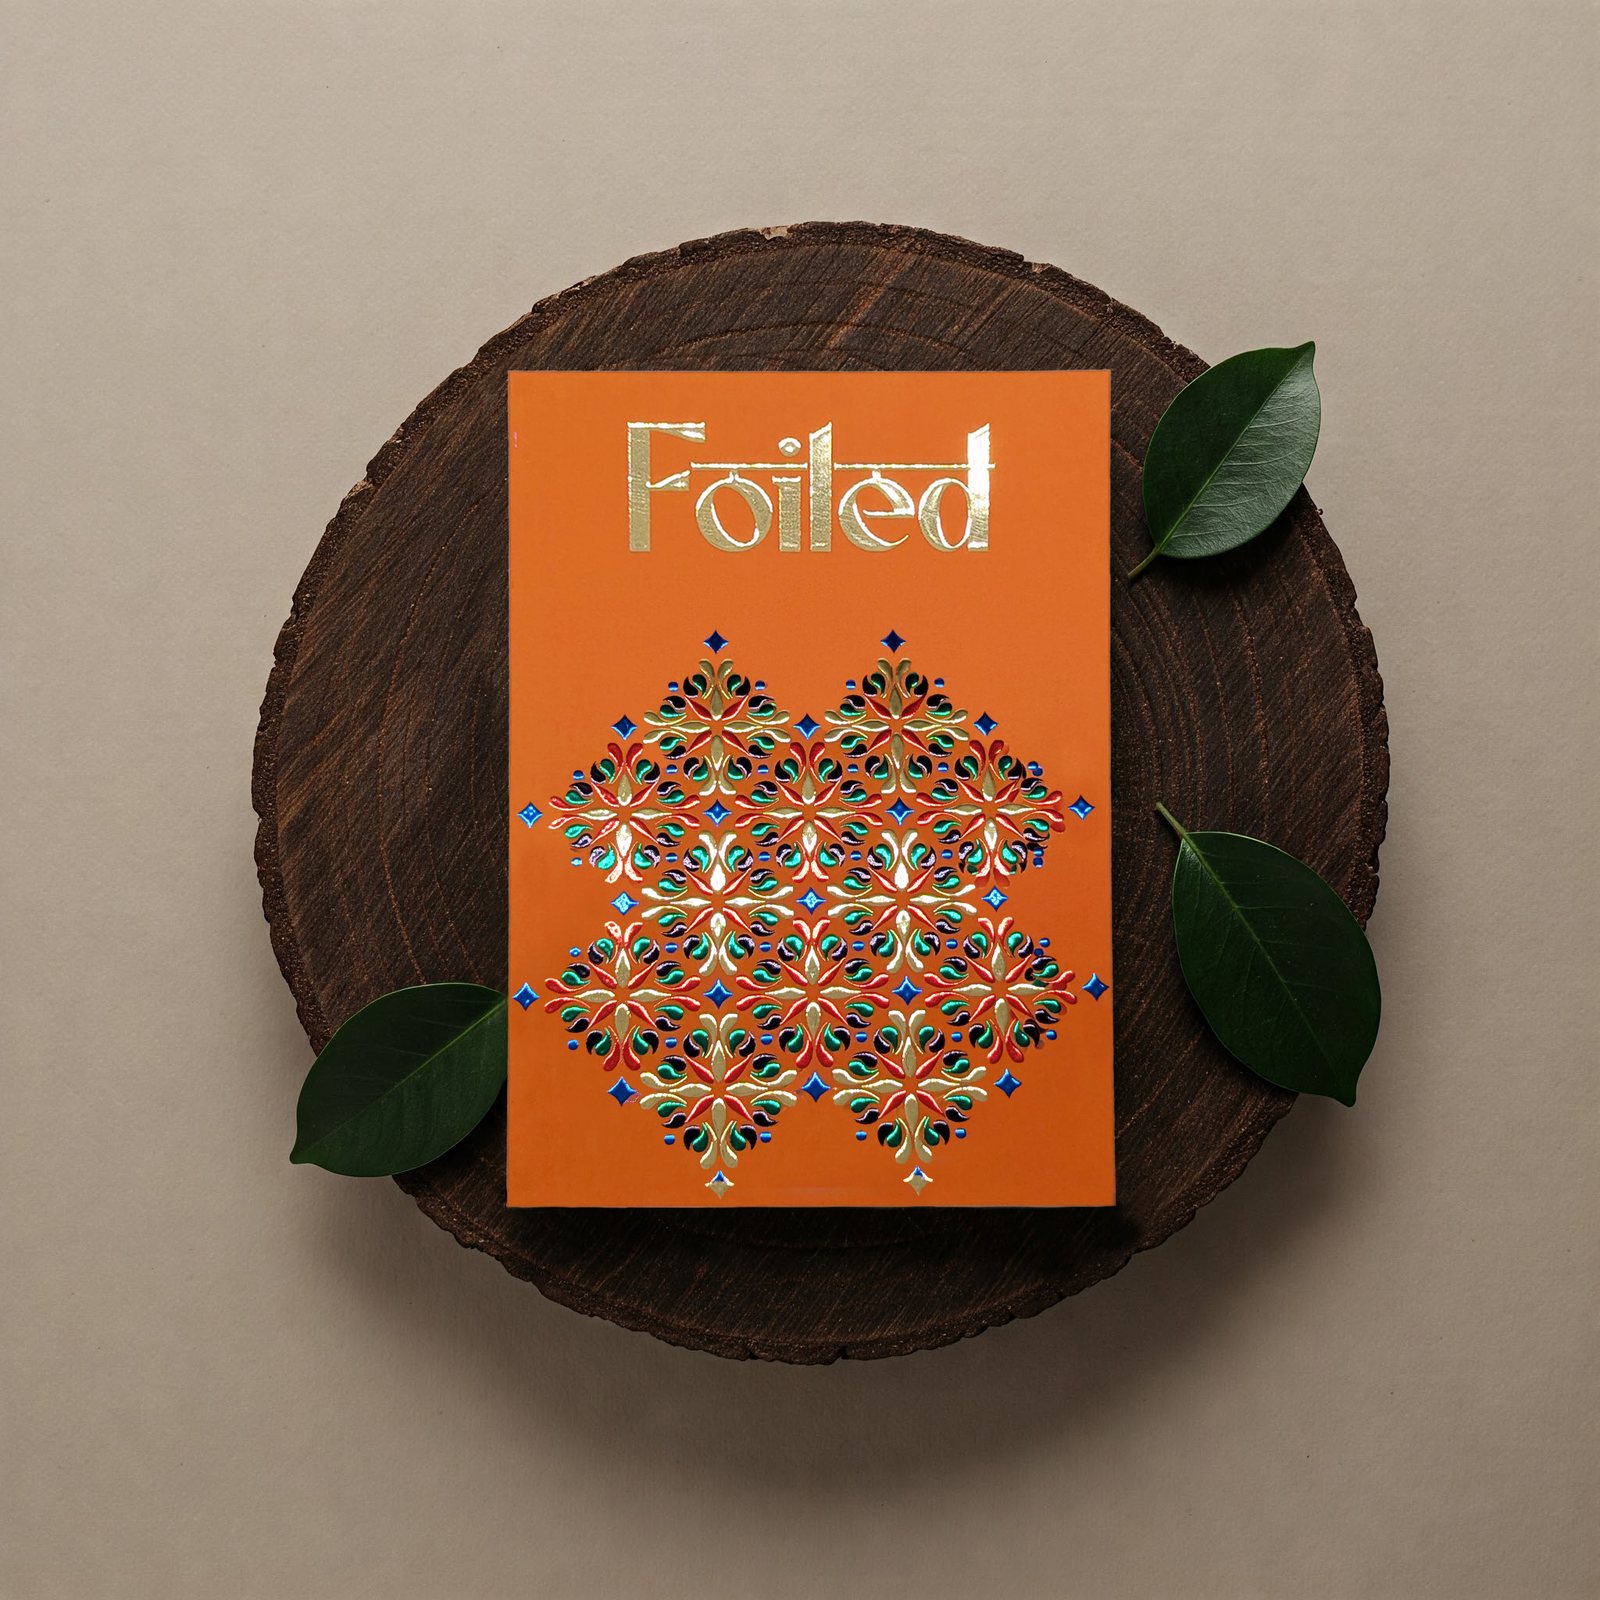
Four colours of raised foil on one card, each run as its own pass. Every pass has to land in register with the ones before it, and the card shows the press holding that registration across all four.

Orange card titled Foiled, with a multicolour raised foil pattern, on a wooden board with leaves
The finished card, four raised foil passes

Every piece here starts from a limit: a black module no one can print on, a press that bills by the sheet length, a product line that shouldn’t need a new die for every product, a press with no white station. I design to those limits, so what looks right on screen also runs on the press, at the price the job allows.

Back